DIY wooden tassel maker and how to make a tassel without any knots showing
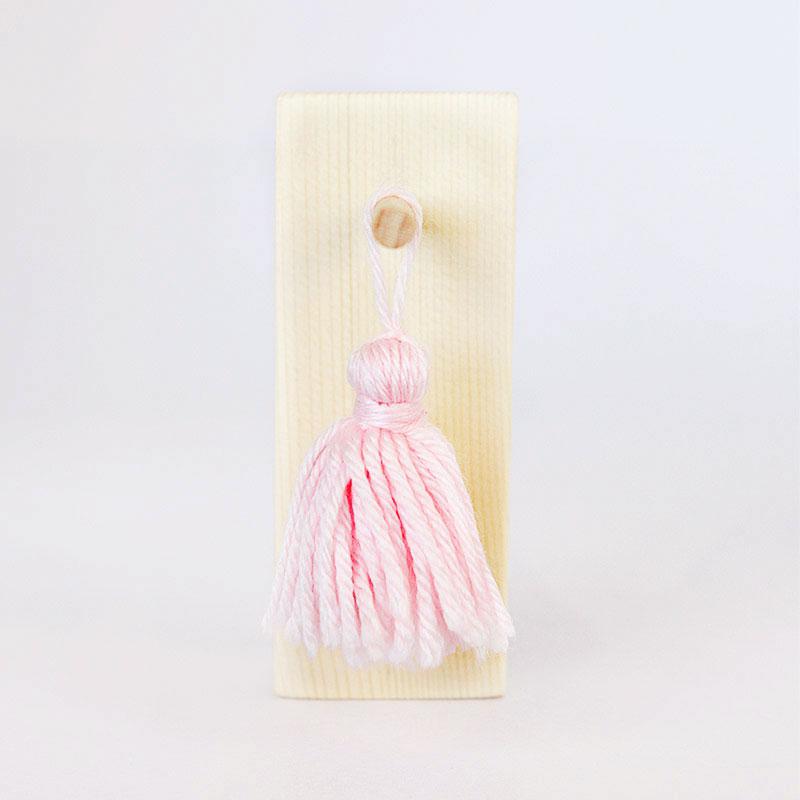
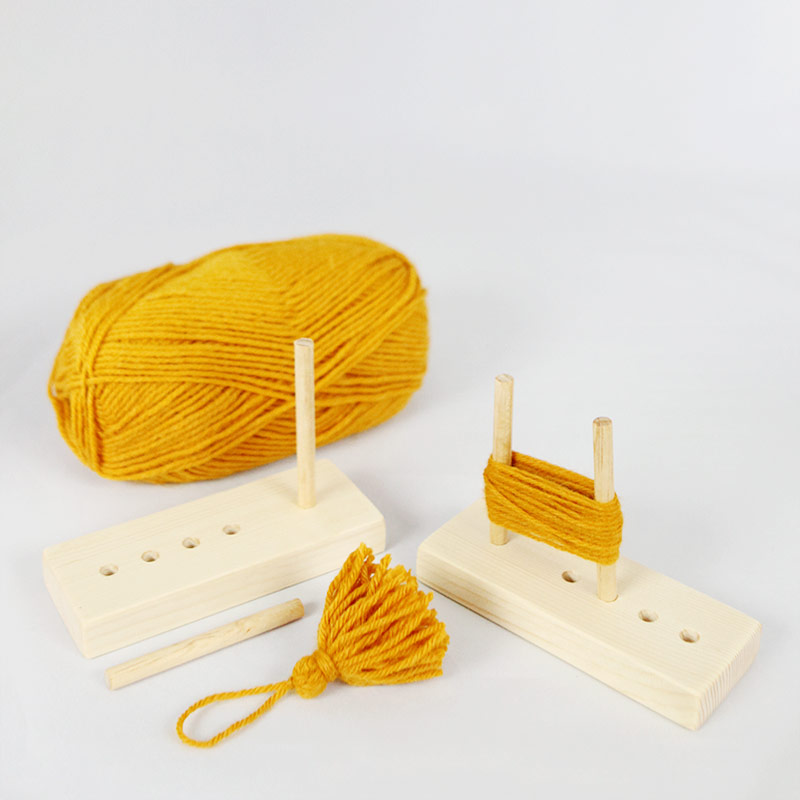
I had an idea to make a hand made wooden tassel maker or two so that I could quickly make some tassels for home decor projects and for gift wrap. I know you could easily just wind some yarn around a piece of cardstock to get the same effect, but I just think there is something so nice about a handmade wooden craft tool. And it is much more durable than a piece of cardstock. And you can make four different size tassels with this one.
I am also showing how to make a tassel without any knot showing on the tie-around which really elevates your tassel to the next level. If tassel making has levels.
How to make a wooden tassel maker
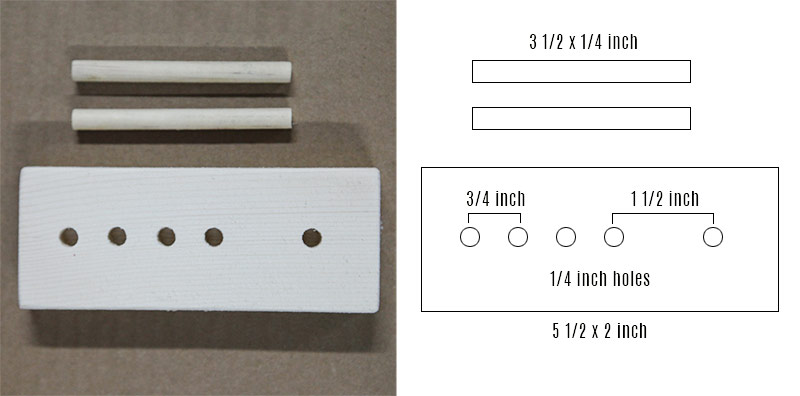
The tassel maker should fit well into your hand. I made mine 2 inches wide, but smaller works too. I made mine 5 1/2 inches long.
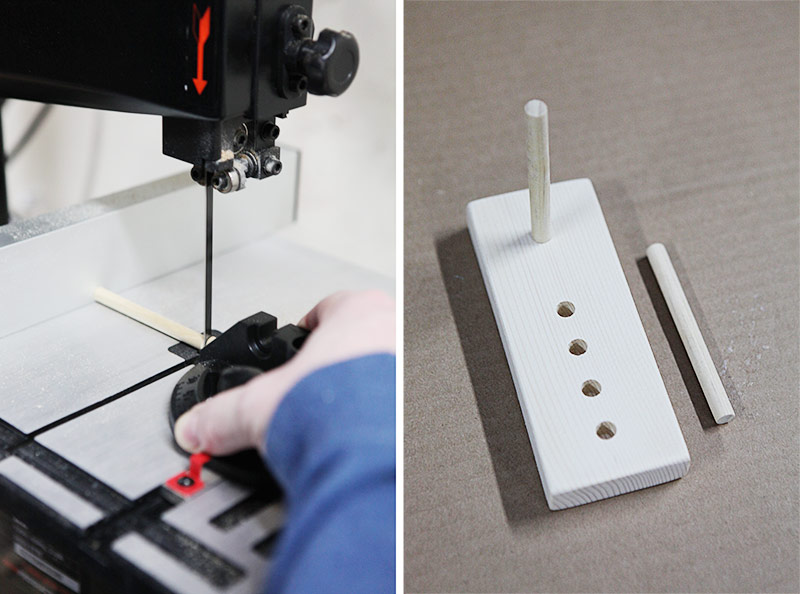
After we cut the piece of wood to size I took it to the drill press and drilled 5 holes with a 1/4 inch drill bit. All measurements are shown further down.
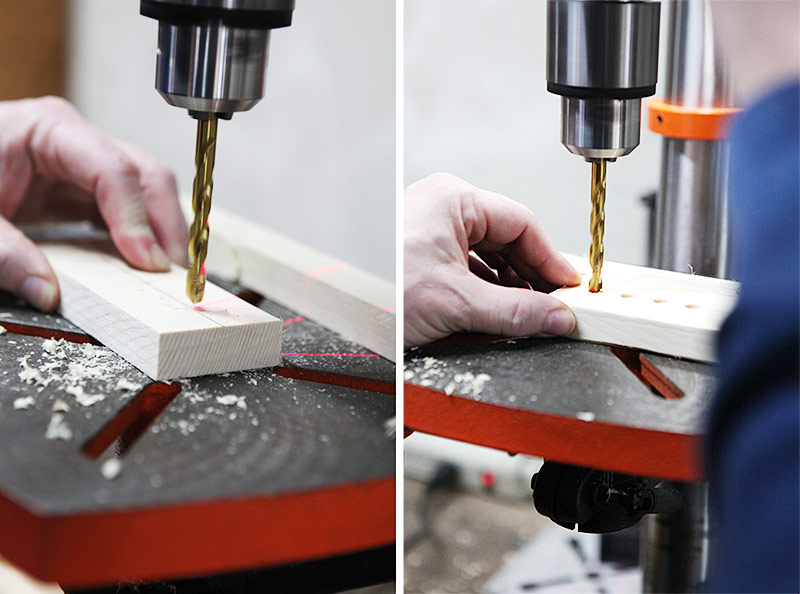
Then I cut two pieces of 1/4 inch dowel for each tassel maker. Each dowel piece was cut at 5 1/2 inches long. One dowel was glued permanently into the hole that will anchor one end of the tassel. The other is left unglued so it can be inserted into any of the four remaining holes to alter the length of the tassel you are making.
Here are the measurements of mine.
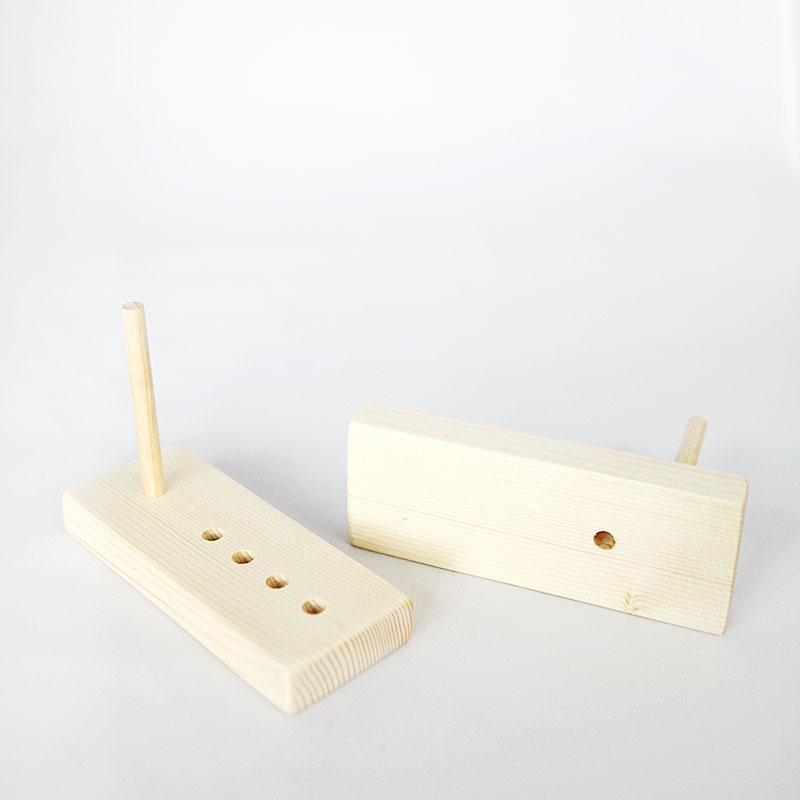
On the back side I also drilled another 1/4 inch hole. This will be used to mount the tassel makers to the wall in the craft room when they are not use. Probably from a small nail. The hole is drilled between the anchor hole and the first hole for the shortest length of tassel, on the back. Just so I didn't drill through one of the existing holes on the front.
Now, about getting rid of that knot
This is basically my tutorial, and I quickly made a bunch of tassels and then I started searching the internet because I was dissatisfied with just tying a knot on the string that goes around the tassel. I thought there must be a more pro way. And there is. I had to sit through quite a few tassel videos before finding a better way. I will link to that video below. I found myself starting and stopping the video as I was following along, so I made a photo series as well (also for posterity), but I do recommend watching the video as well.
How to make a tassel with no knots showing.
Making the loop
This first part is not in the video however. This was just the way I chose to make the loop so that you also did not have a visible knot there - it is in the title and all - but it only works with yarn that is not too smooth. Wool yarn it works with quite well, but wool blends are already quite a bit smoother. Smoother than that and this method is probably out. Then go for a double knot. The other tie-around can still be without a knot. Even with embroidery thread which is very smooth and shiny.
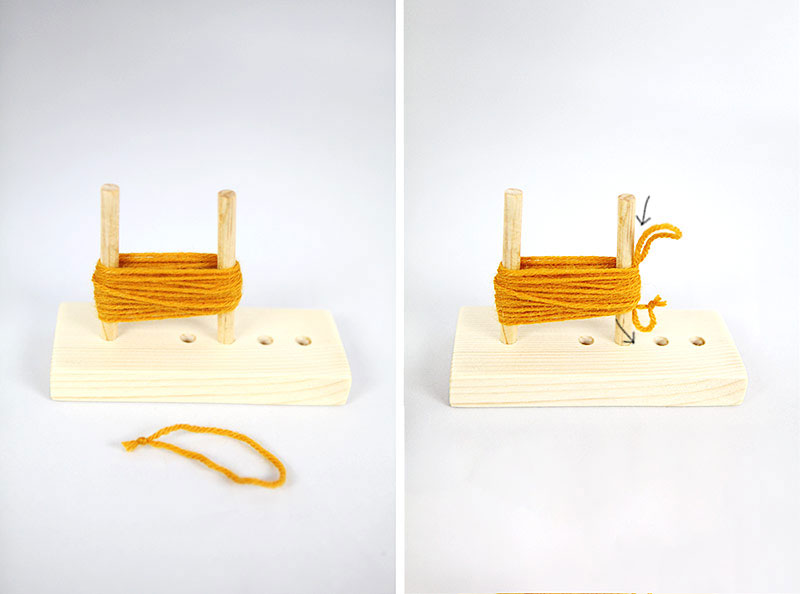
Left picture:
Here I wrapped the yarn around 40 times. Cut a piece of string - mine here is about 5-6 inches long. Tie a knot to make a loop.
Right picture:
Tuck the loop between one of the sticks and the bundle of yarn. Off-set the knot by about 3/8th of an inch as shown. This is so the knot slips in behind the yarn bundle when you tighten the loop.
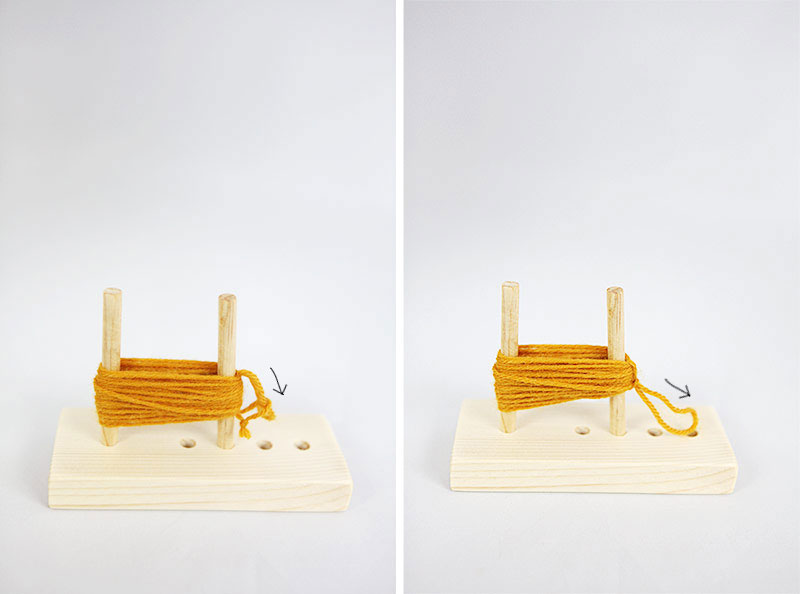
Left picture:
Put one end of the loop through the other.
Right picture:
Pull tight. Remove bundle from the tassel maker.
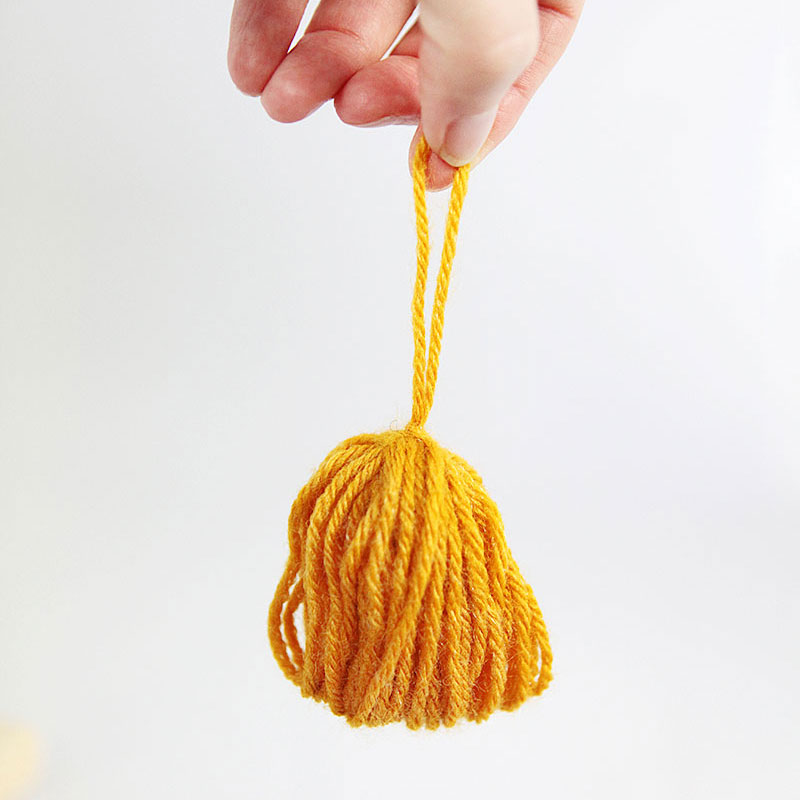
On smoother yarn like the one I used for the light pink tassel (a wool/polyester blend), it still worked for me, but you may need to employ other methods if you yarn is even smoother than that.
Making the tie-around around the tassel
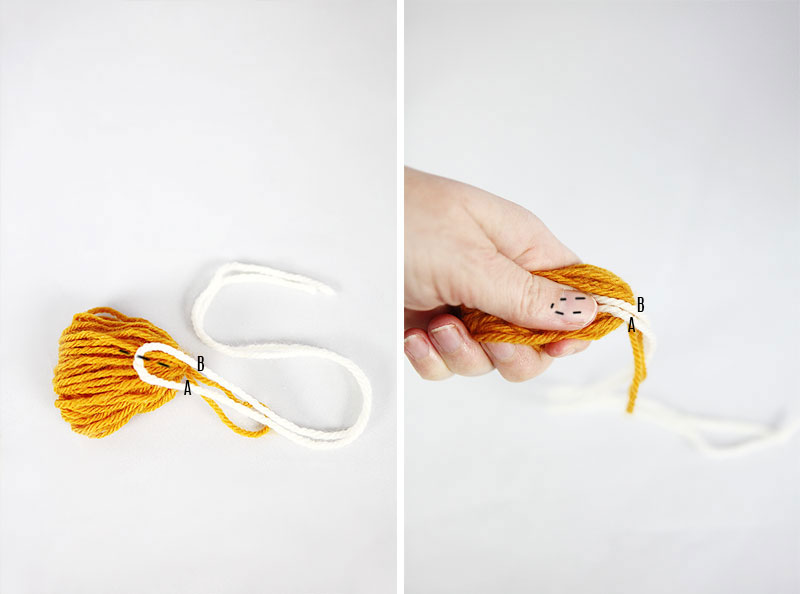
Left picture:
Here I have made the string for the loop in a contrasting color so it is easier to follow along. I cut about a 20 inch piece of string. Fold the string and pretend that the fold is separating the A string from the B string, please note that you use quite a bit more of A than B, so feel free to make A longer even though I didn't do that in the pictures. Put the loop (Loop A) on top of the tassel that you just removed from the tassel maker.
Right picture:
Hold loop A tightly under your thumb as pictured with the dashed line. Let string A land below string B.
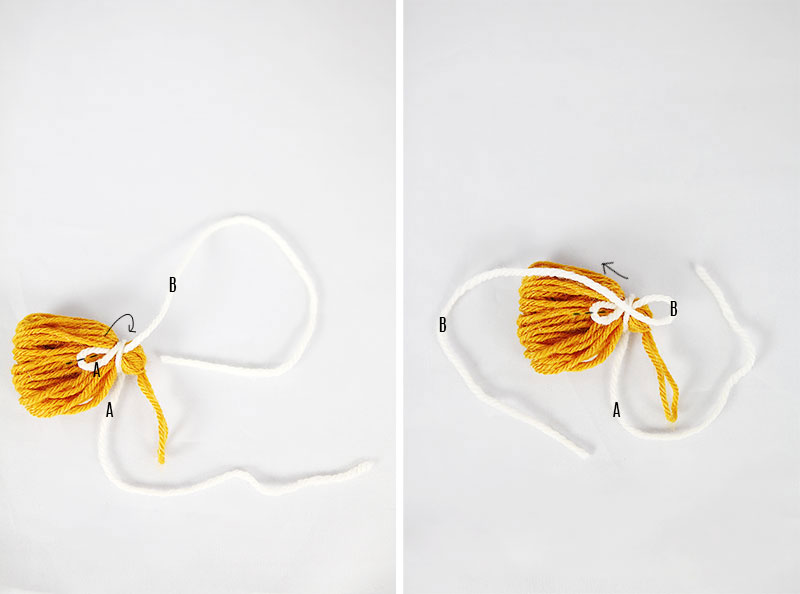
Left picture:
You will keep holding loop A with your left hand and the tie-around string with your right hand, but I am picturing it here without my hands so you can actually see what is going on. Holding loop A tight with your left thumb, tie string A going up and over around the tassel three times.
Right picture:
On the third rotation, stop, then with string B make a loop (loop B) that lays the opposite direction of loop A. Grab the B string from loop B with your left thumb as well to hold it with loop A. Then continue tying string A around another three times. Or more depending on the look you are going for. The tie-around is what is going to hide the knot in a moment.
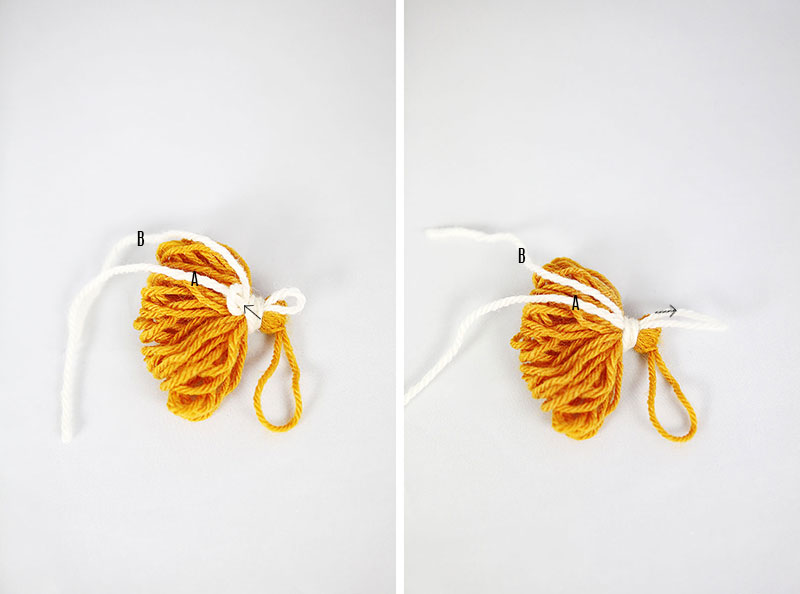
Left picture:
After the last rotation put string A through loop A which was sitting under your thumb until now.
Right picture:
Then gently tuck on one of the sides of loop B. On of the sides will be stationary, the other one will start pulling loop A up under the tie-around. This is the one you want. Pull until loop A is no longer visible and the knot from it is pulled up under the tie-around.
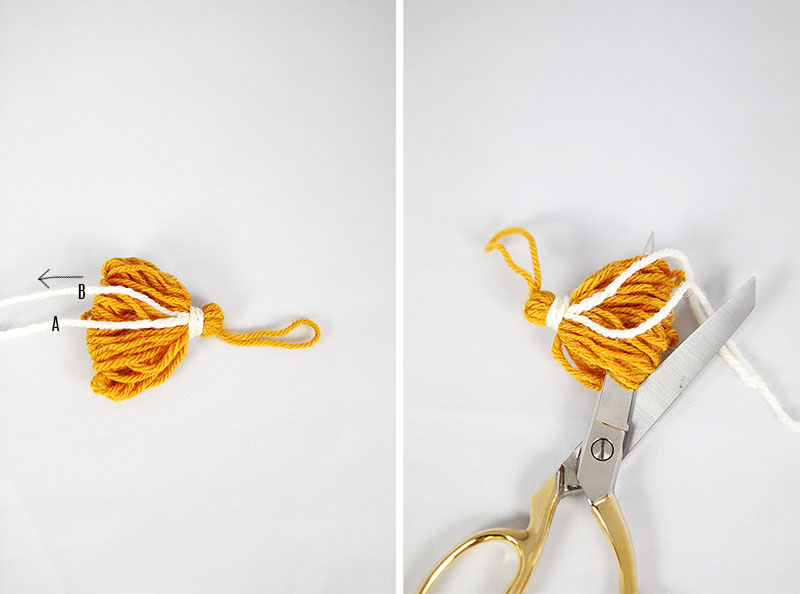
Left picture:
Then pull down on string B. This will pull down on loop B until it disappears under the tie-around as well.
Right Picture:
Now you can cut the tassel loops to finish the tassel. The tie-around will be the same color in yours, and you can just cut those two strings the same length as all the others and they will blend right in.
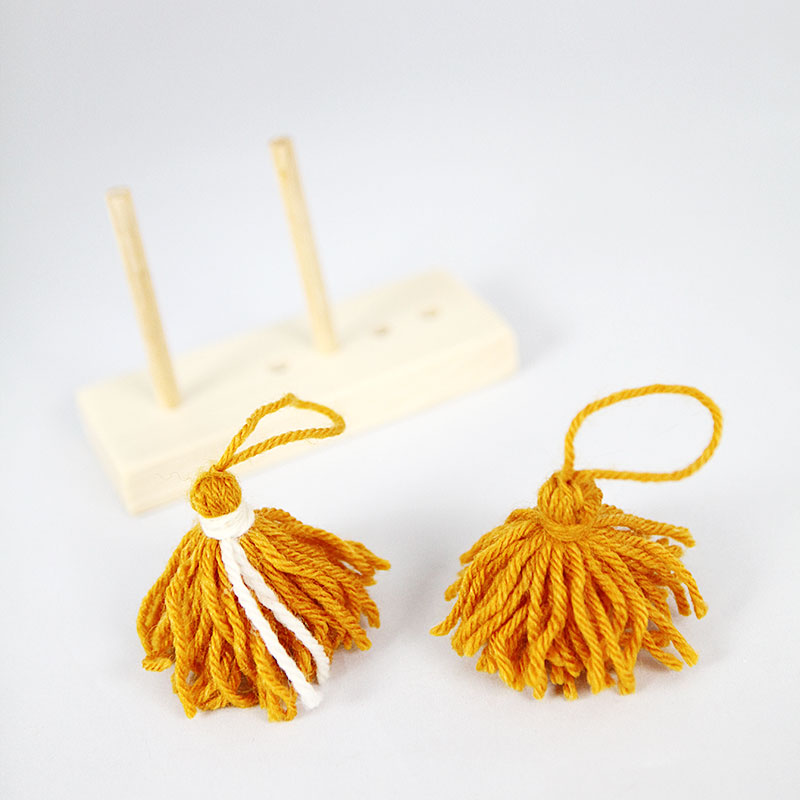
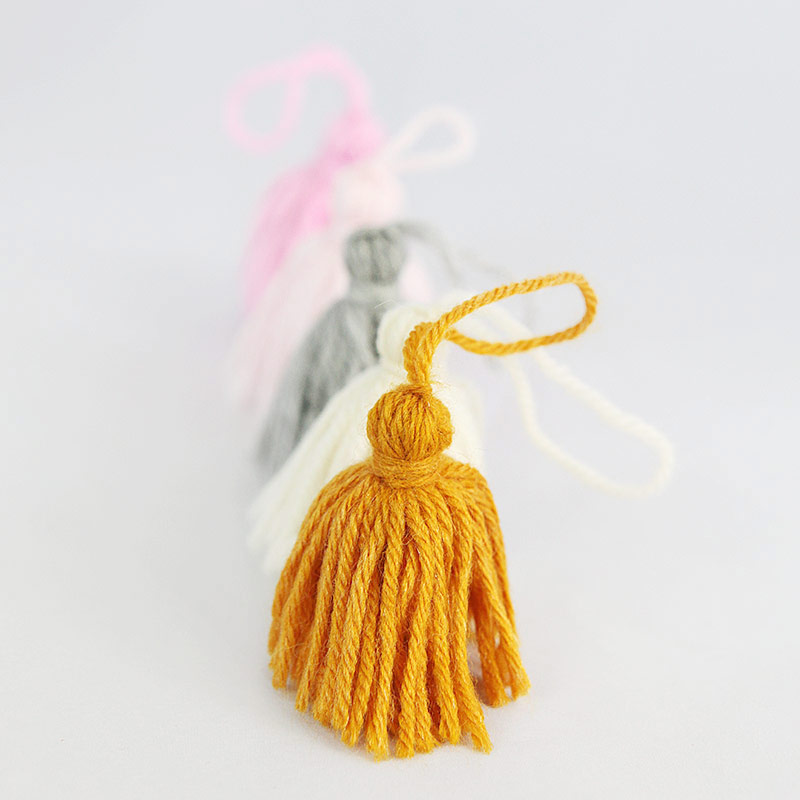
The knots are all inconspicuously hiding out inside the tassel and tie-around. Huge improvement over seeing a knot, right?
I quickly made a bunch more tassels. Once you have the system down you can crank these out in minutes with the tassel maker.
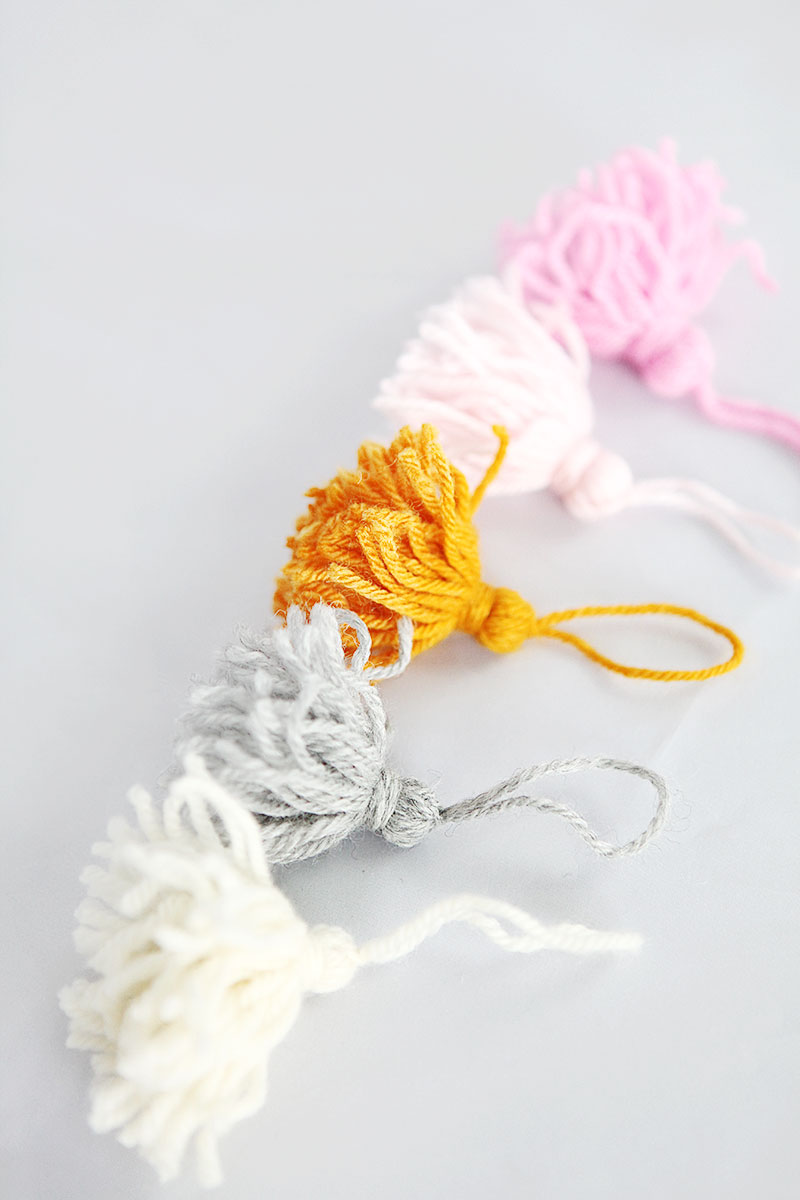
I used new yarn for all mine from the inside of each ball of yarn. It turned out to be quite curly. If you don't like that look you can absolutely iron them. I used my iron on the wool setting and just turned and pressed, turned and pressed. Then straightened with my hand while the yarn was still warm from the iron. The result was really good as seen below.
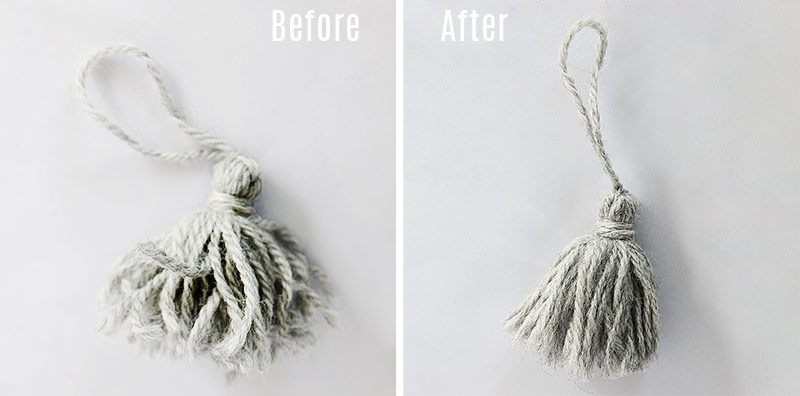
Isn't that how you normally spend your Tuesday afternoons? Ironing tassels. No?
A huge shout out to Tangles N' Knots who are showing the tie-around here.
Funny aside: I showed my 16 year-old the images above without providing him any accompanying text to see if he could figure out the steps from just that. He did! So consider this tutorial teen-tested and mom approved. Ha.
I think these look great as decor on baskets or on gifts. I put one on a hanger in our new green guest room. I also made 10 other DIY projects for that room including designing my own fabric and upholstering the bed. You can find that post on A Home for Design here.

Some blog posts contain affiliate links to products I use. More information
This article: DIY wooden tassel maker and how to make a tassel without any knots showing first appeared on http://ahomeforcrafts.com.
Share

