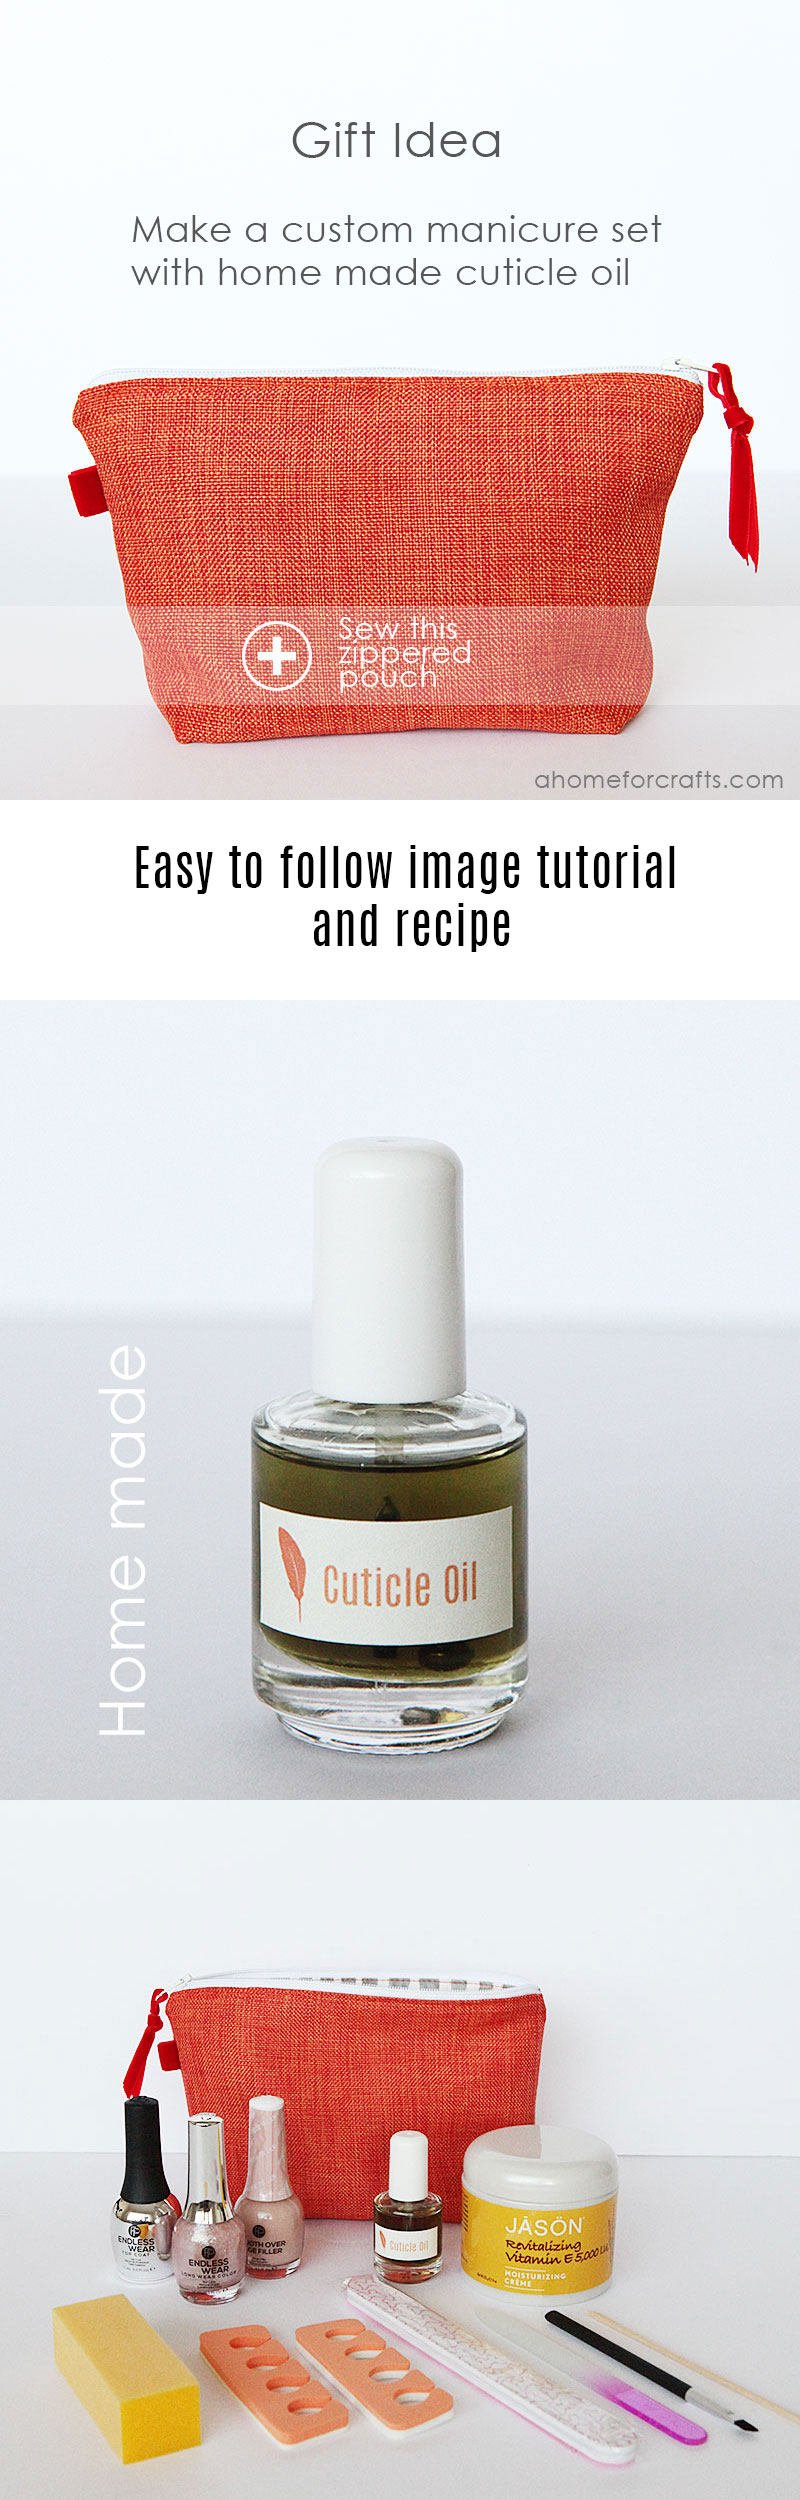
Sew an easy lined zippered pouch

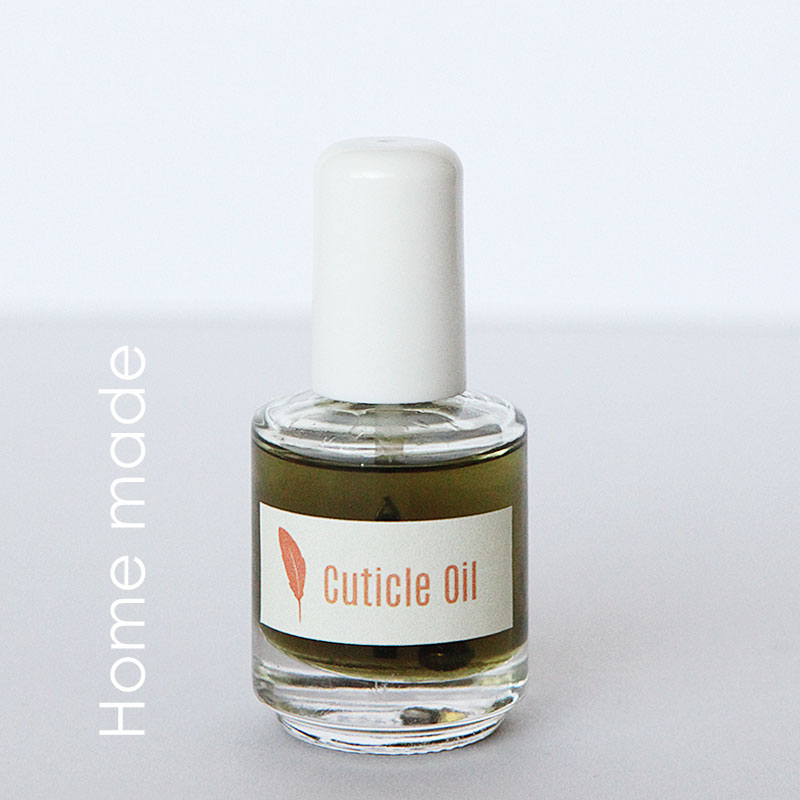
For my Mom's birthday this year, I made her a lined zippered pouch and filled it with nail goodies (manicure kit). I also made her a home made cuticle oil. Link to that recipe after the jump towards the bottom of the post.
This post is all about the sewing tutorial however. Here is how I cut the fabric and sewed the pouch. It took about 15 minutes after I had all my materials out and ready. A little bit extra to stop and take all the photos of my process so I can share it with you.
Let's take a look.
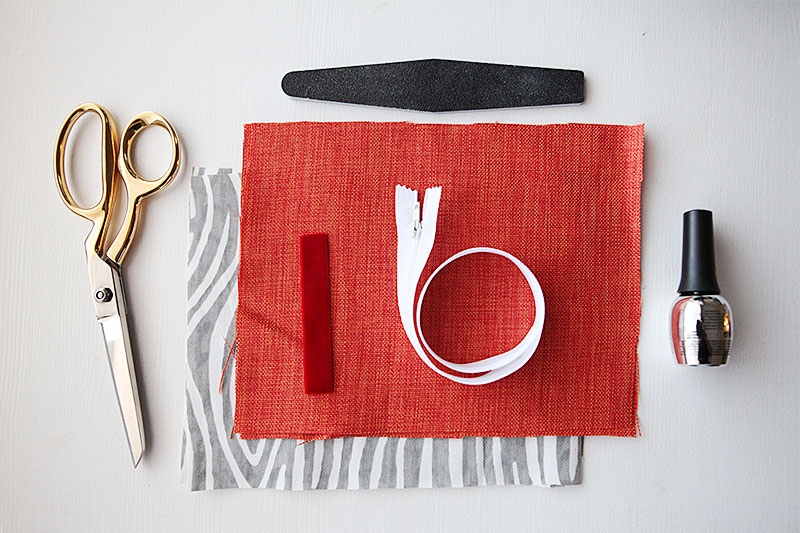
Because I knew I wanted to fill the pouch with nail goodies, I took out a nail file and a nail polish bottle to make sure they would fit inside the finished pouch. My pouch has a flat bottom which comes out of the height of the fabric so that 2.5 inches for the bottom has to be added to the height when determining the fabric size. A little extra room is added so the pouch is not too cramped when filled with all the goodies I picked out.
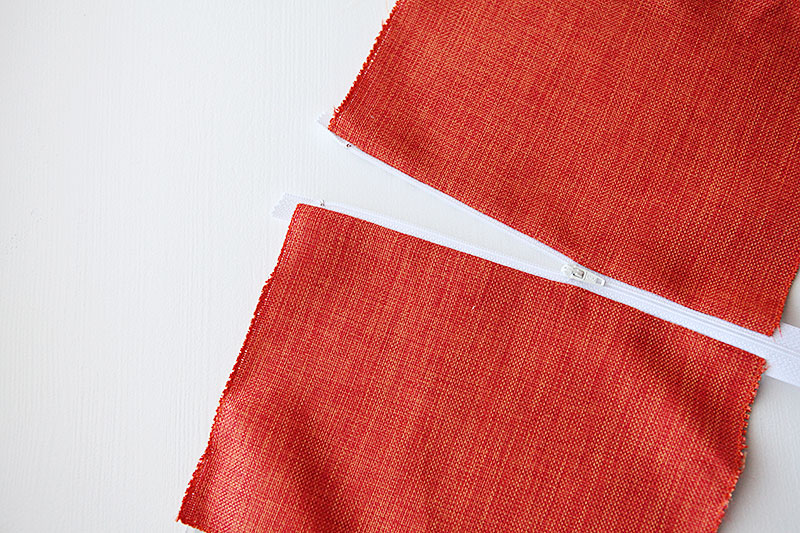
My fabric pieces are 9.5 inches wide by 8 inches tall. I cut two pieces of orange fabric and two pieces of gray zebra stripe for the lining. I used a white zipper and some velvet ribbon from the craft store for embellishments. I used a zipper that was longer (12 inches) than the width of my pouch (9.5 inches). This worked because I was using the orange fabric which is an almost tweed like thick linen which was very forgiving. For the best result for other less forgiving materials, use a zipper that is the same width as the cut fabric squares.
What makes this project go really quickly is the way the lining and the zipper are attached to the project. Even though it sounds more difficult to add a lining, with this method, it actually makes the project much quicker and also much more finished looking at the end.
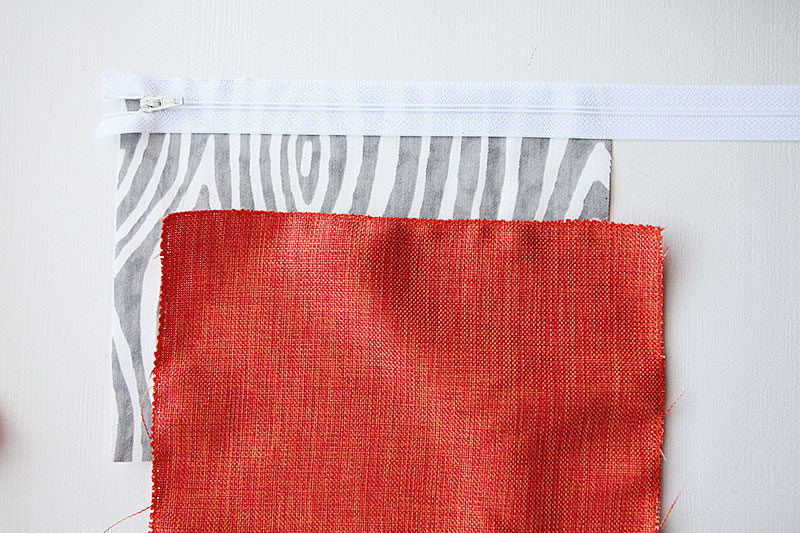
Lay the zipper, face up, on the right side of the lining.
Then add the outer fabric over top and pin it down. You are going to stitch on the top side of the zipper teeth. I added black dashes where the stitches should be.
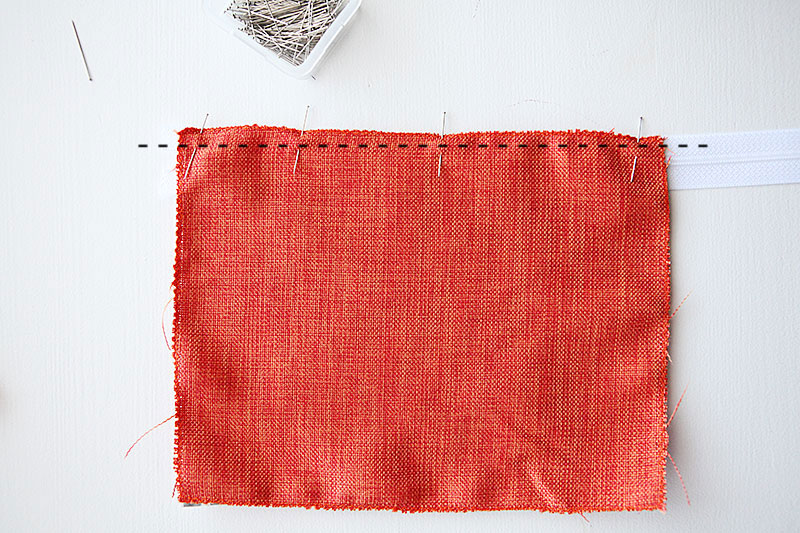
Below you can see how I stitched the zipper. I took the project in and out of the sewing machine when I needed to move the zipper pull out of the way.
When you lift the orange fabric the zipper is now attached like this.

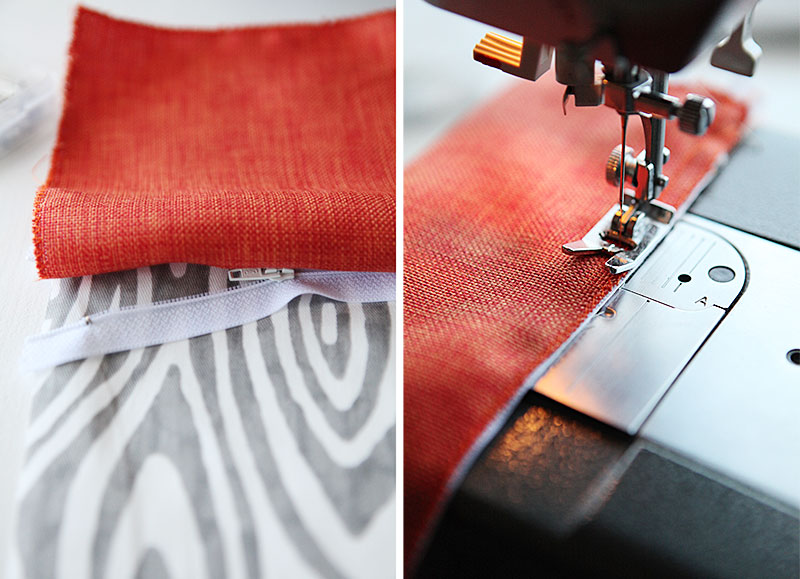
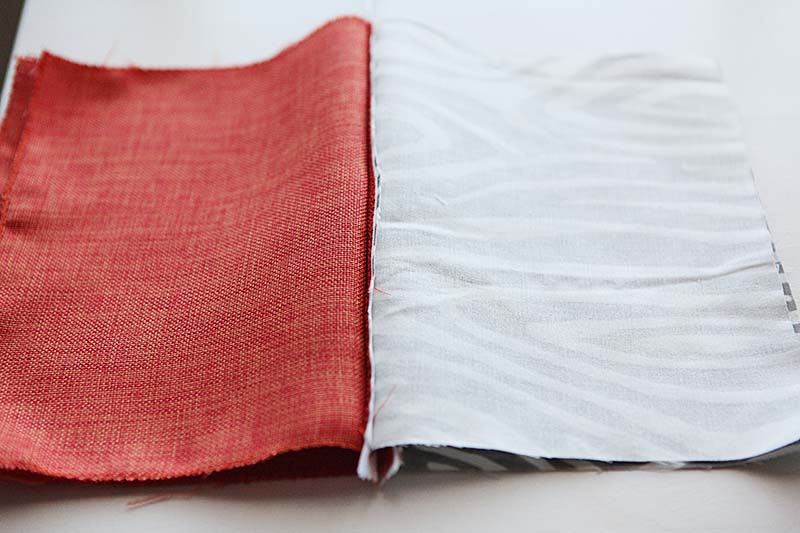
Flip the the fabric back on each side of the zipper to expose its other side as shown below.
Then sandwich the zipper between the other piece of fabric and lining. Each pair of coordinating fabric need to be on the same side of the zipper respectively.
Pin down and stitch along this edge as shown by the black dashes below. The other fabric is sitting in between the new layers but is out of the way so it is not caught in the next stitch.

Here you can see what it looks like when holding it up.

Next flip the orange fabric away from the zipper, putting one piece on each side of the zipper. Do the same for the lining under neath.
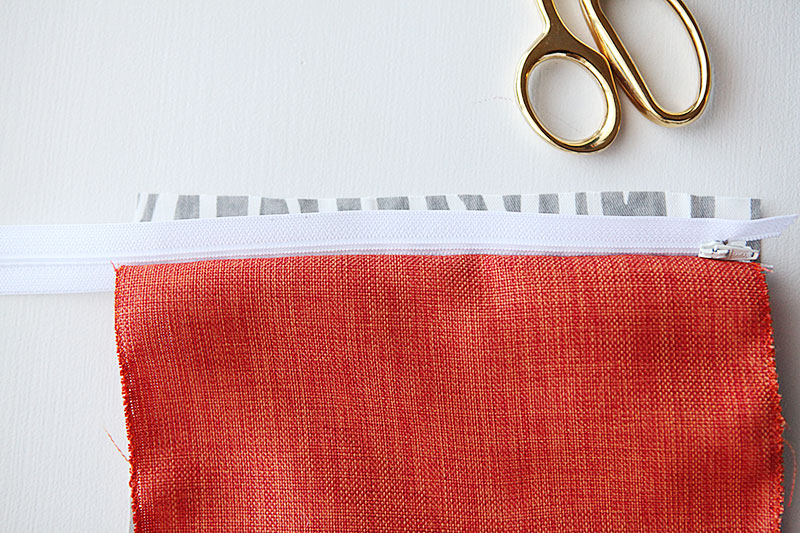
Gently give the fabric a light press with an iron, then top stitch along the edge so the fabric lays flat as seen below.
IMPORTANT: Now unzip the zipper before completing the next steps. You can see below that we have each half of the bag on each side of the zipper now. The lining is directly underneath the orange fabric attached to the underside of the zipper.
Wasn't this pretty easy? And this was probably the most complicated step in the whole process... It's all down hill from here.
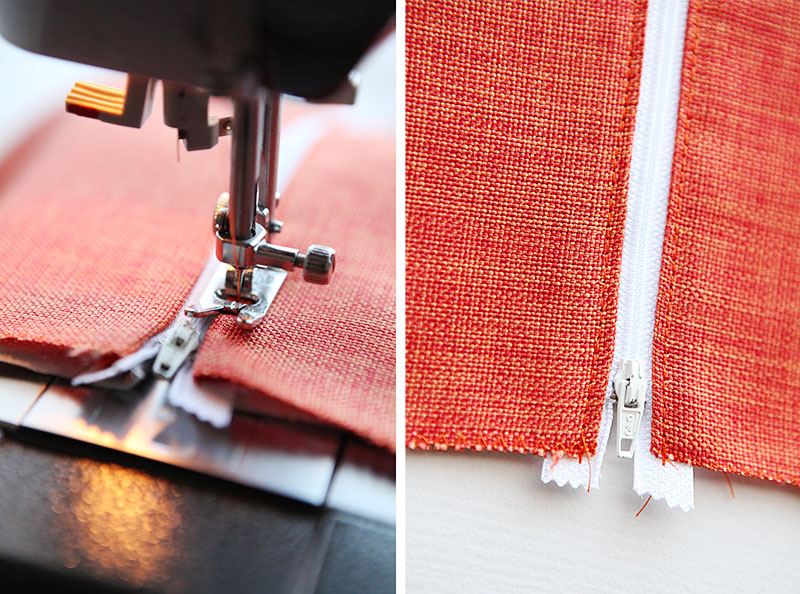
After you open the zipper flip the fabric over so the orange sides are together wrong side out and the two zebra lining sides are together, also wrong side out. It looks like this.
Pin all the way around the perimeter, but leave about a hand width size opening at the bottom of the lining.
By the zipper you need to fold the zipper around the orange fabric which will make the zipper look right at the end.
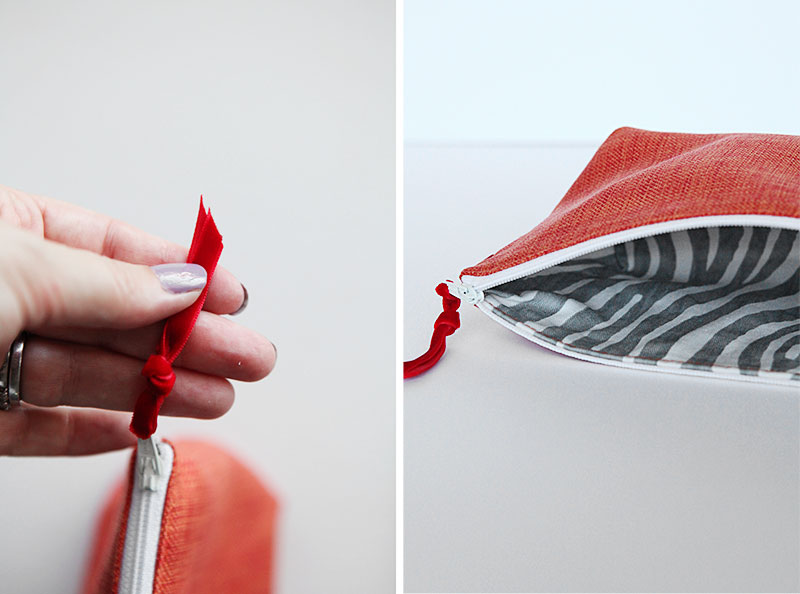
See how I folded the zipper here at both ends.
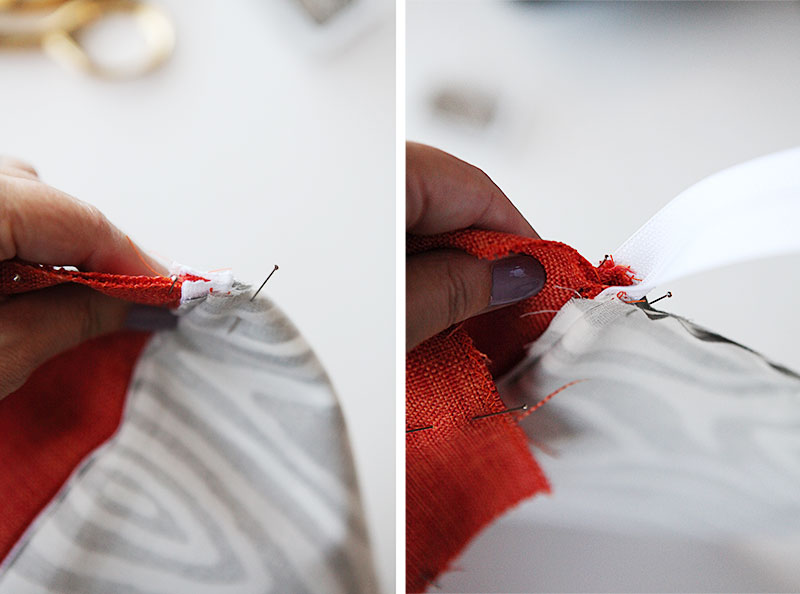
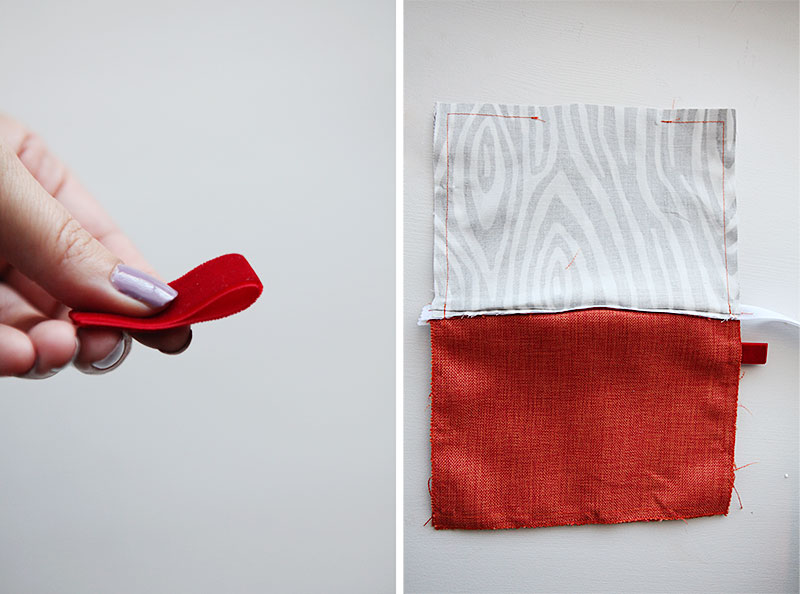
I also added a piece of red velvet ribbon to the side of the orange below the closed end of the zipper. You can skip this step, but it does add a little extra embellishment to the pouch.
On the picture below you see the ends of the ribbon. The loop is inside the fabric.
You can also see how I stitched all the way around but left an opening at the bottom of the lining. This is where we are going to turn the pouch around.
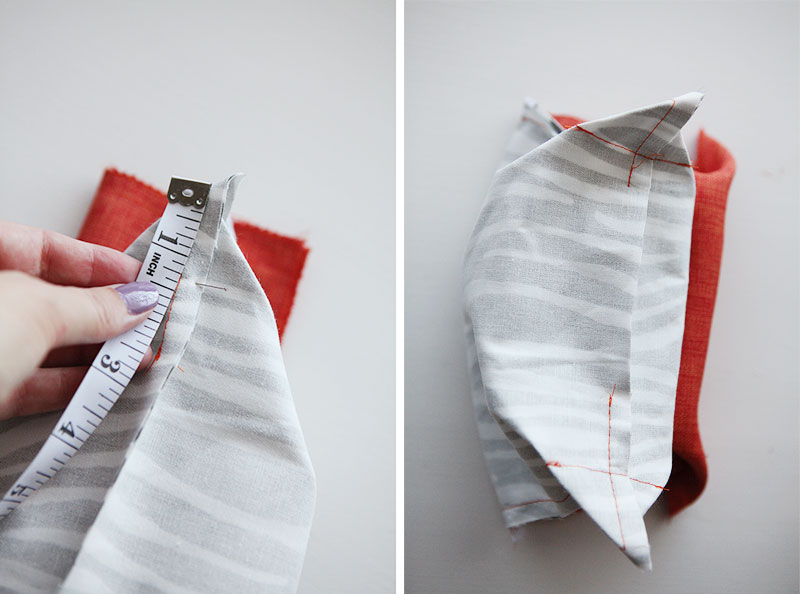
Before I turned the pouch, I stitched the corners at a 45 degree angle. This is what is creating the flat bottom of the pouch so it ca stand upright. I measured down 1.25 inches from the corner and put a needle there. Then sewed at a 45 degree angle all four corners. That would be the two bottom corners on the lining and two bottom corners of the orange shell.
I cut off the excess and put a zig zag stitch around the edges to avoid future fraying.
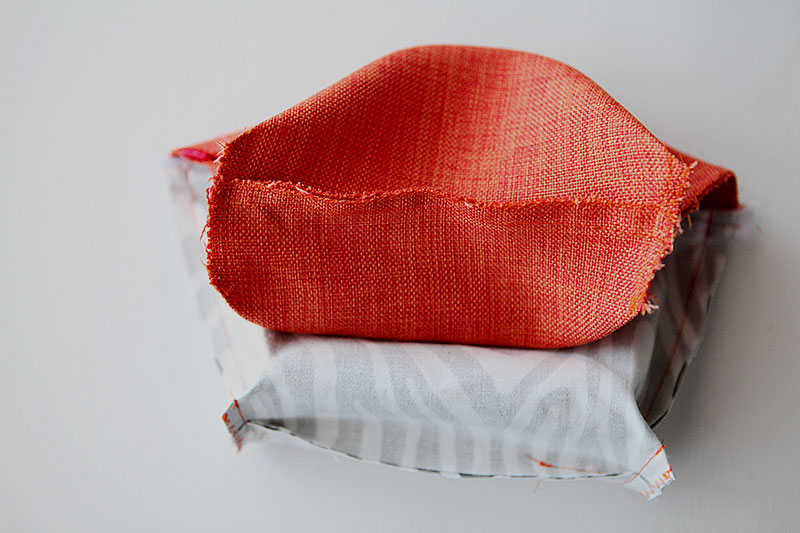
I also cut back the seam allowance around the zipper. This helps the zipper lay flat in the finished product. You can see below how much I cut off.
Before and after:

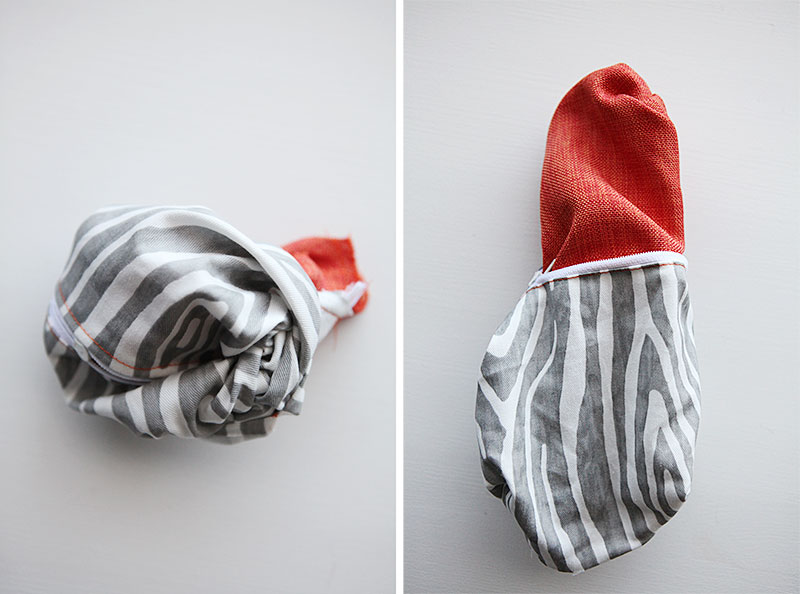
Then I turned the pouch outside-in through the opening in the bottom of the lining. This is where you face palm if you forgot the step of unzipping the zipper earlier. Don't ask me how I know this.
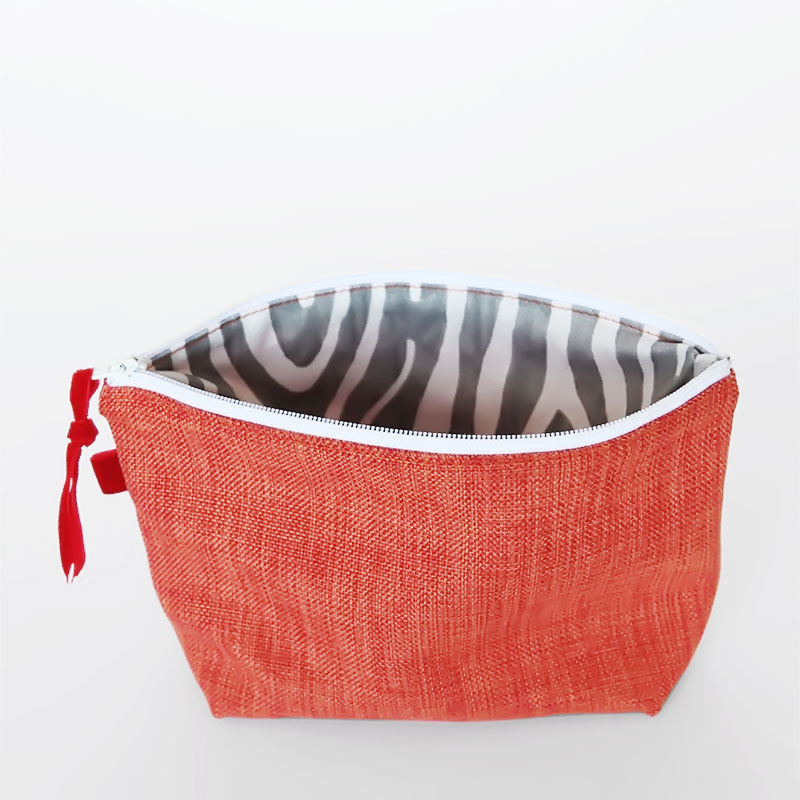
Last step in the sewing process is to fold in the seam, then pin and sew the lining with a stitch close to the edge. Here I switched to white thread because it is so visible with orange on white. You see this stitch directly when looking down into the bag. Worth it to switch to white I think.
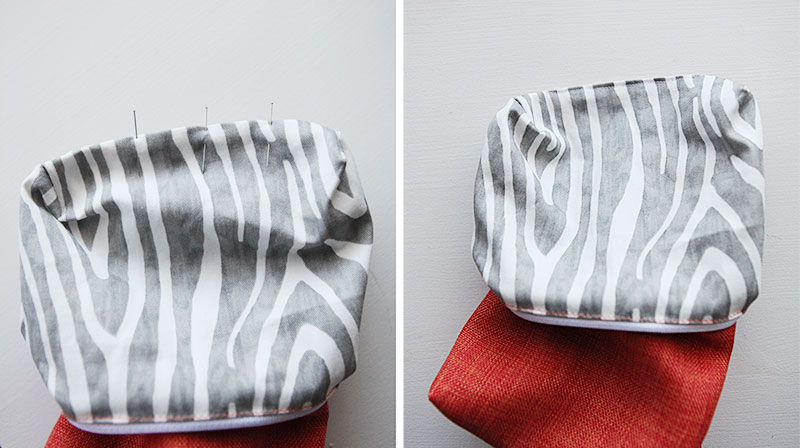
Push the lining into the bag and marvel at your craftiness. Give your pouch a gentle press with an iron to make the seams look flat and nice.
I tied a narrow piece of red velvet to the zipper pull as well. And then the pouch was all done.
This is one of those kinds of projects that look much harder than they are and the end product is very factory finish. I really like that.
I filled my pouch with these goodies for my Mom's birthday gift:
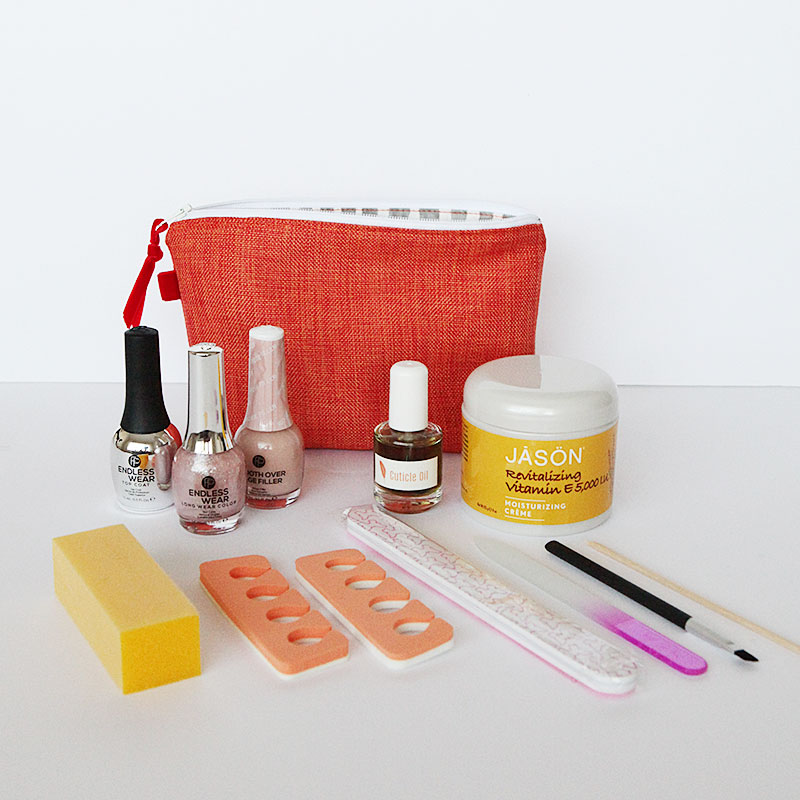
Top coat, polish, base coat, hand made cuticle oil, Natural vitamin E hand creme, buffer block, toe separators, fine grain nail file, glass nail file, corrector brush (I have since found this brush set which has a much better corrector brush), orange stick.
For a beginner at painting nails it is great to give a nail polish that is a bit sheer and has a color that is somewhat close to your natural skin color as it is much more forgiving when applied.
---
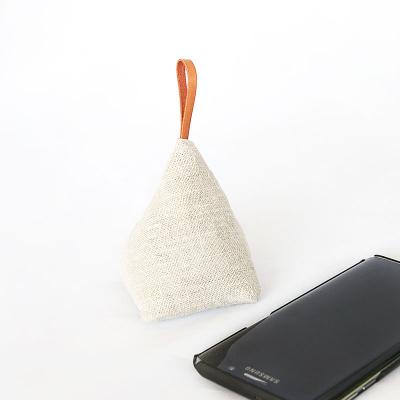
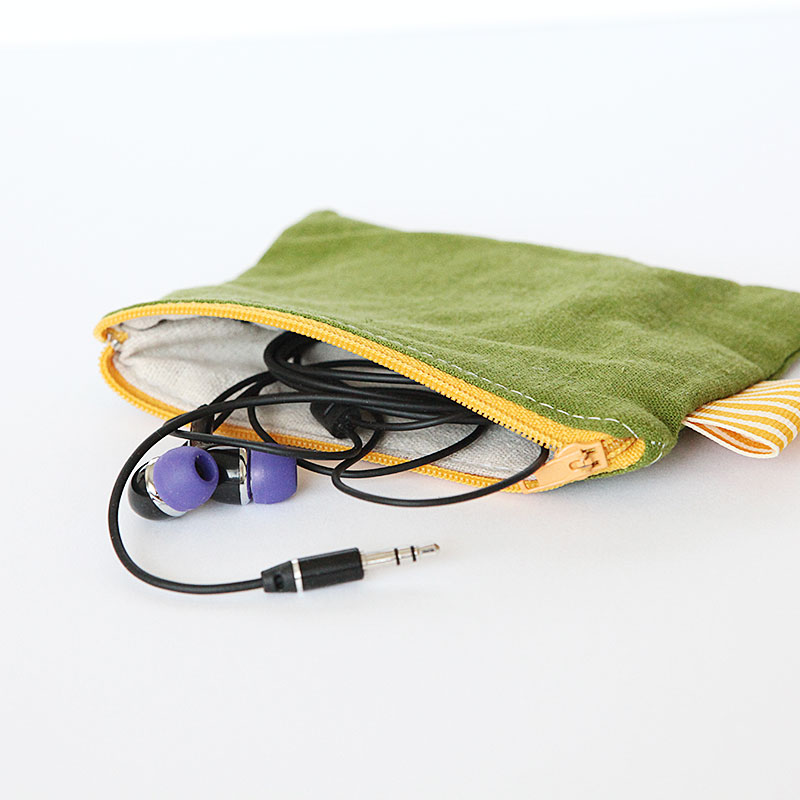
I made a couple more pouches while I had my sewing machine out. Here is a small pouch for my ear buds that I carry in my purse.
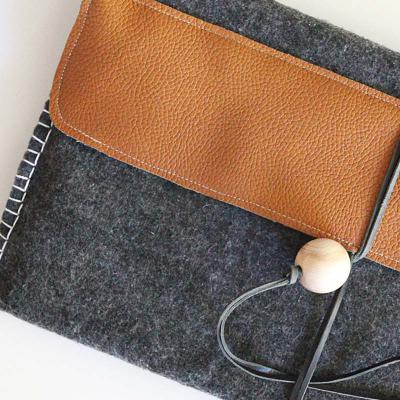
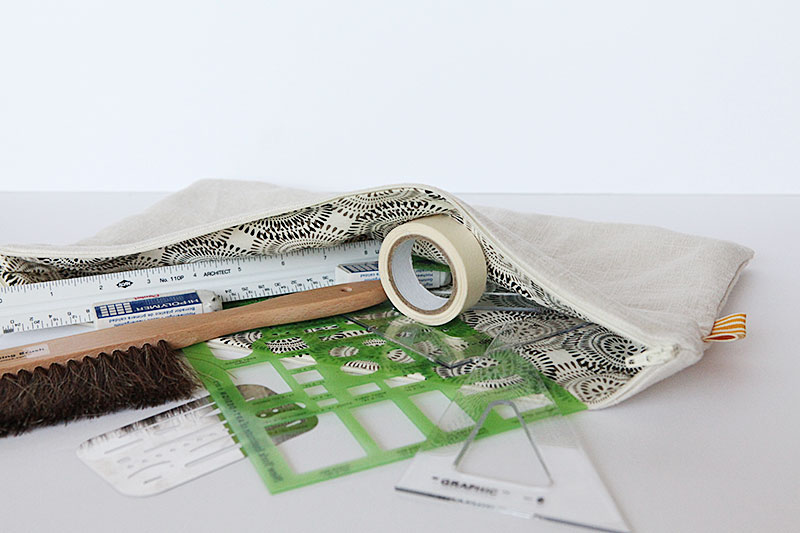
And here is a large pouch that I made to contain my drafting kit which I use when I make floor plans neatly by hand.
Check out my new nail blog to see how to make the home made all natural cuticle oil
Pin this:
Some blog posts contain affiliate links to products I use. More information
This article: Sew an easy lined zippered pouch first appeared on http://ahomeforcrafts.com.
Share

I am a Danish American decorating life in Seattle. I love all things design and I am especially passionate about color, scale and texture.
I can’t think of anything more fun than coming up with a new project, making it, photographing it and sharing it with you on my websites.
AHomeForCeramics.com AHomeForDesign.com AHomeForFood.com AHomeForCrafts.com My Portfolio