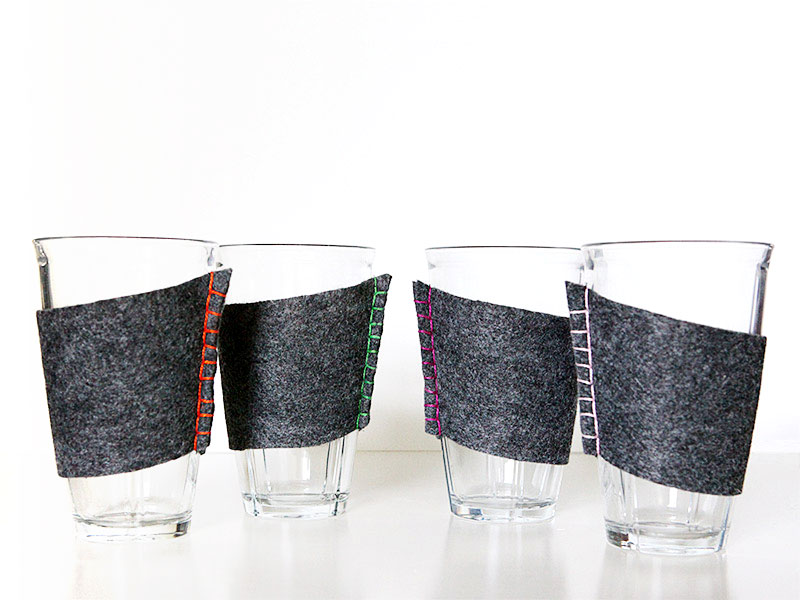
Felt sleeves for hot beverage glasses
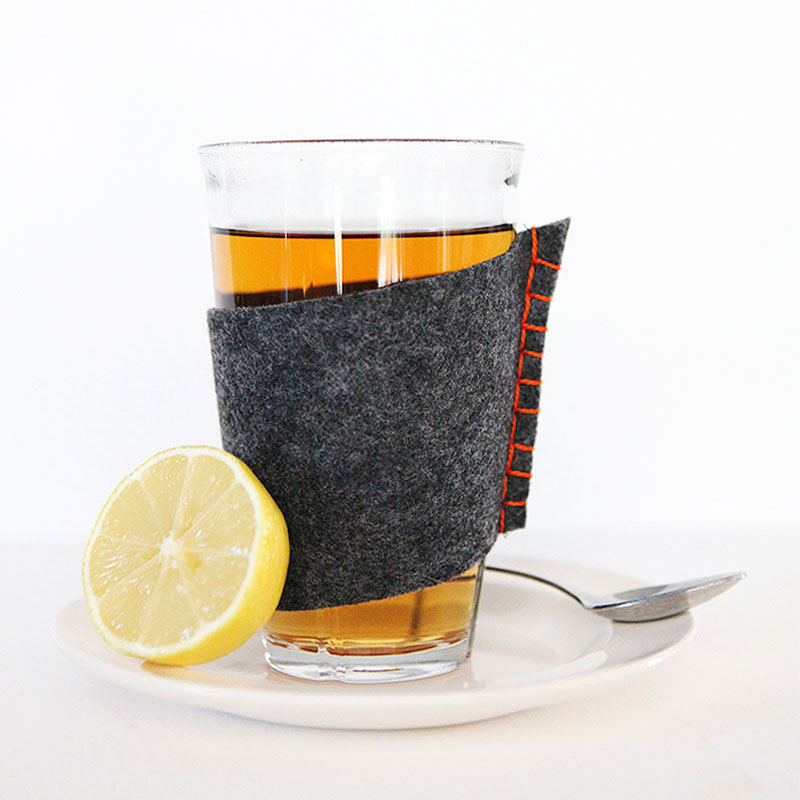
Over the last two years I have brought home some new glasses with me from Denmark in my suitcase. I just love the slight curve along the side of these glasses. And the four grooves. The glasses are nice and sturdy and pretty big. They hold two cups of liquid. The glass is thick so they are suitable for hot beverages as well and we use them for our hot tea all the time.
They do get hot to the touch, though, so I made these felt sleeves for them.
The glasses are Rosendahl Grand Cru Soft Latte glasses. You can get similar ones here, only these have straight sides and are a bit smaller (1.125 cups). I drink this tea in them which has become my favorite: African Nectar by Mighty Leaf. It is a mild rooibos tea with a nice smooth flavor. It's organic and caffeine free and I picked this brand because they don't use toxic materials to make the bags themselves.
To make the sleeves, I used the same gray felt as I used for the laptop bag I made, and for the felt flower napkin rings too. It is a thick dark gray felt with lighter gray threads mixed in. I think it is one of my favorite felts both in terms of thickness and color/pattern. I am pretty much a s sucker for any fabric that has a slight pattern, but reads as a solid. Just like this one.
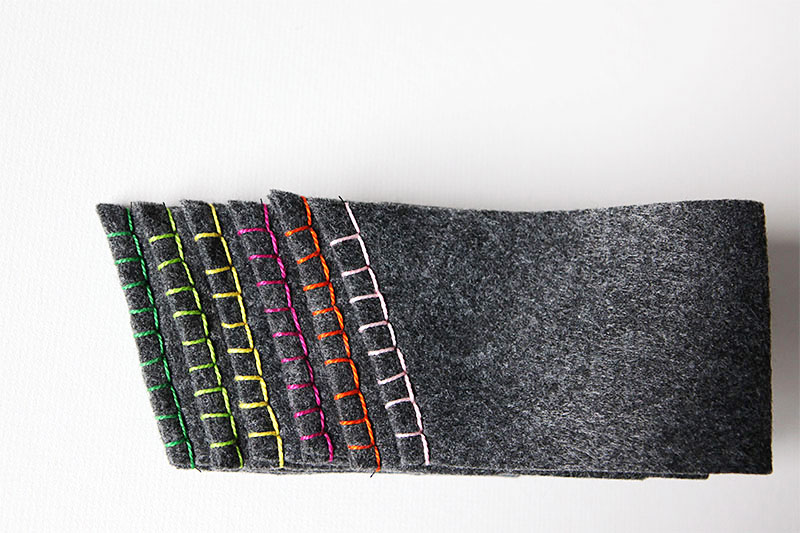
Here is a visual of the steps I took to make the sleeves.
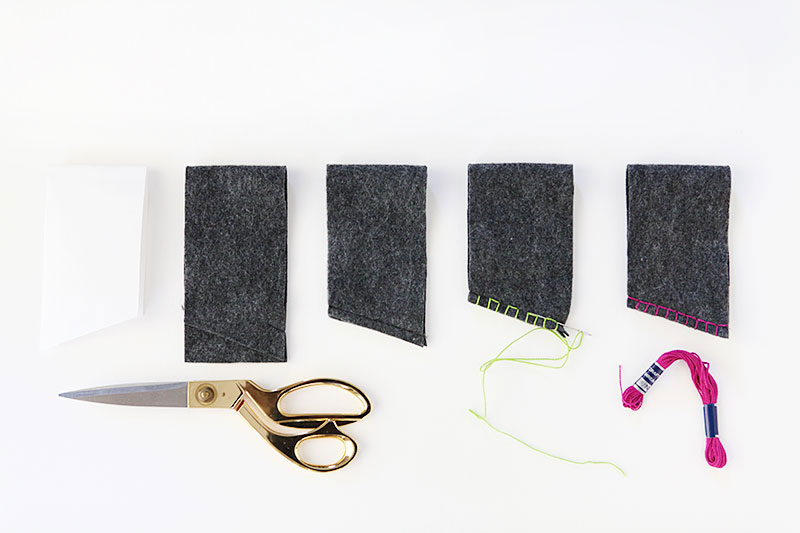
I first made a paper template by cutting two 3 inch strips of paper from an 8.5 x 11 sheet of paper, then taping them together end to end to have a strip that was long enough to reach around the glass. I put the strip around one of the glasses and creased the paper where I imagined the seam would go.
Next, I cut a strip of felt from the pattern, but left it square at the ends. I machine stitched a seam along my markings, following my template, only making it slightly smaller to account for the give in the fabric. You should experiment a bit with that before going into serial production so that you don't end up making the sleeves to big, because then they will go to high up on the glass or in worst case scenario your glass will plump right through.
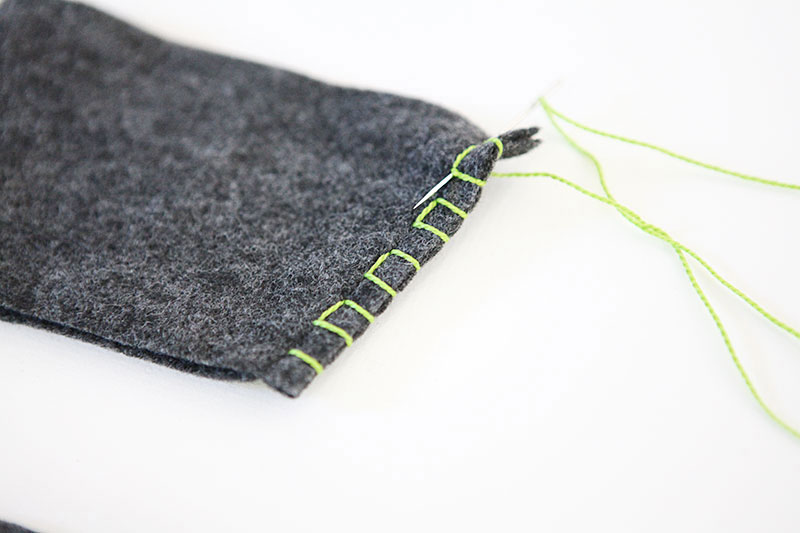
Once the machine stitch is where you like it, cut the seam back to about 1/4 inch as you see on the middle sleeve above (The one to the left of the green stitched one above).
I sewed up 8 sleeves, although I am only showing 6 finished ones below. Then I hand stitched a decorative edge in different colored craft floss. That way it is easier to remember which glass belongs to whom when you have guests over. I used the same stitch type that I did on the laptop bag. It looks like a reversed blanket stitch to me. I don't know. It was a stitch that I thought would look good. I am probably not the first one who has made a stitch like this.
By the way, as far as supplies go, craft floss is different from embroidery floss. Craft floss has two strands twisted together, whereas embroidery floss has six strands that simply lay next to each other so they are easy to separate into however many strands you are using. I find that craft floss works best for this type of application, but both work.
You start the stitch by going through the sleeve 1/4 inch up from the bottom of the machine seam. Then you pass your needle around the seam and come back up the same hole. Now you have a horizontal stitch. Then you sew through the seam 1/4 inch further up the seam, now at 1/2 inch from the bottom. This creates the first vertical stitch, which covers the machine stitch. Then repeat around the seam. Once you get to the top you will have created all the horizontal stitches and half of the vertical stitches on one side, with half of the other vertical stitches on the other side, alternating.
Then it is just a matter of weaving the needle up and down, hitting the holes of each horizontal line as you come back down the seam to create one continuous line of stitches covering the machine stitch. Then you tie the end inside the seam flaps, thereby hiding it. Don't go through to the inside of the sleeve as you would be able to see that once the sleeve sits on the clear glass. Cut the lose end.
Then you repeat for each of the other sleeves. I cut my felt and machine stitched mine one morning - that took about 15 minutes. Then I brought them to park day with me where I stitched the colors while chatting with the other moms. My teen got in on the action as well. This is the perfect take along project.
Supplies:
Felt (similar), Needle, Craft floss, Glasses (same brand, but a bit smaller (1.125 cups / 27 Cl capacity))