Hallween wreath in pink, peach and yellow - very easy to make.
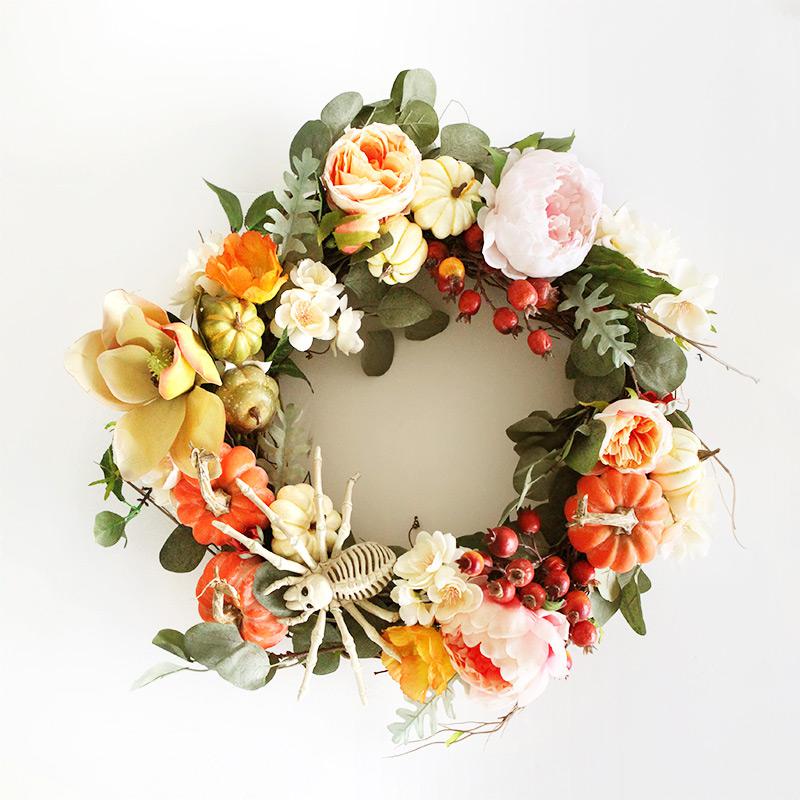
This year I wanted to switch up the color scheme of my Halloween wreath a little bit and use more yellows, pinks and peaches.
The steps to make this are very easy. Here is a picture tutorial of how to make this in about 20 minutes.
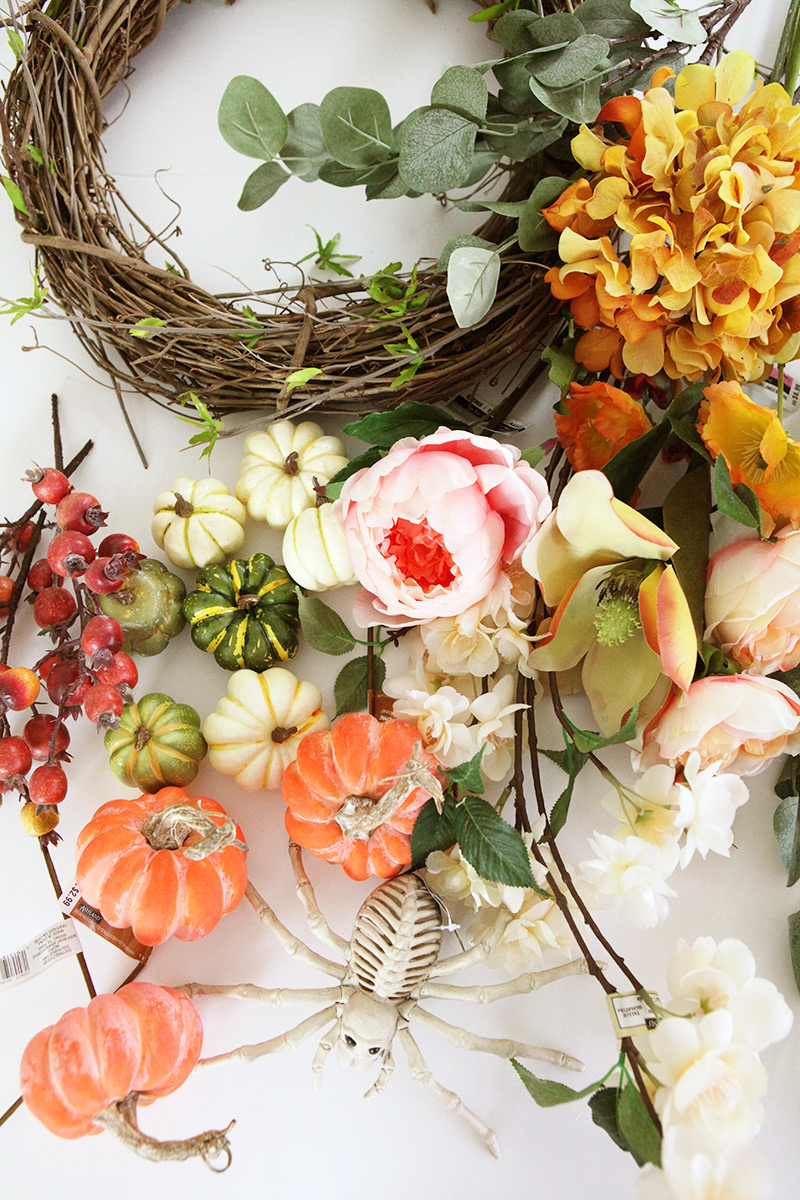
First I armed myself with a copious amount of coupons, and then I hit up my local Michael's store (The shopping part is obviously not part of the 20 minutes) and bought a few floral stems, three orange pumpkins on wires and a little bag of assorted miniature pumpkins.
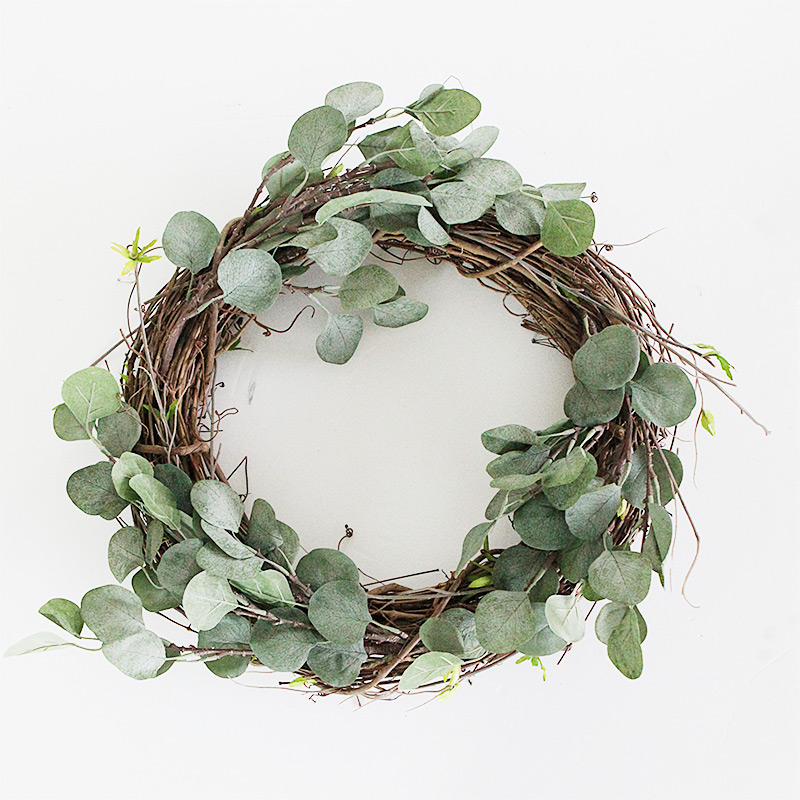
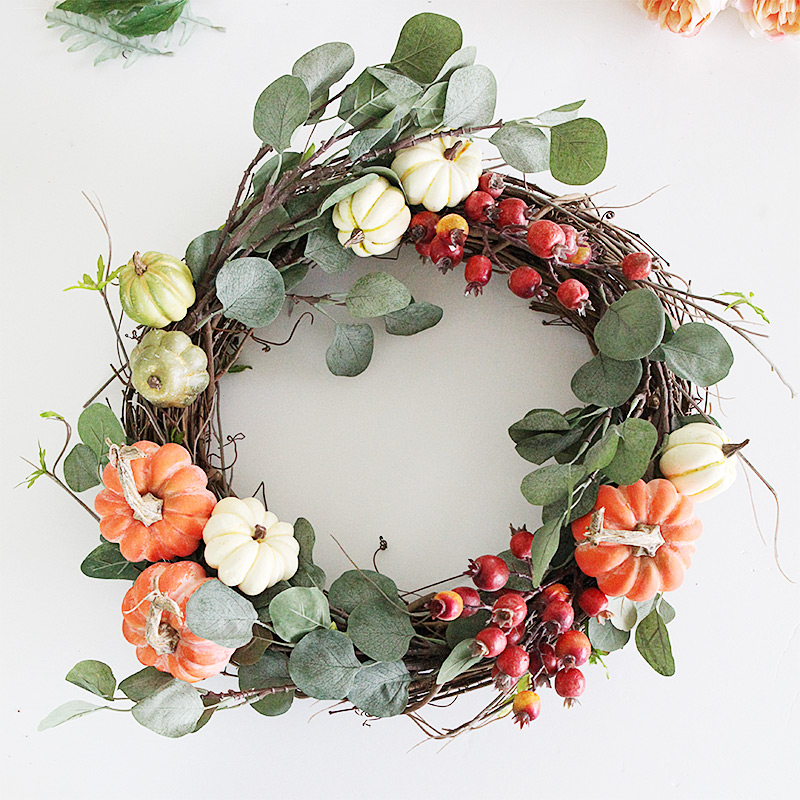
I used the same grape wine wreath I have used for the past 10+ years and just removed last fall's items from it. It had some stems of tiny red berries, which I kept for this year's wreath.
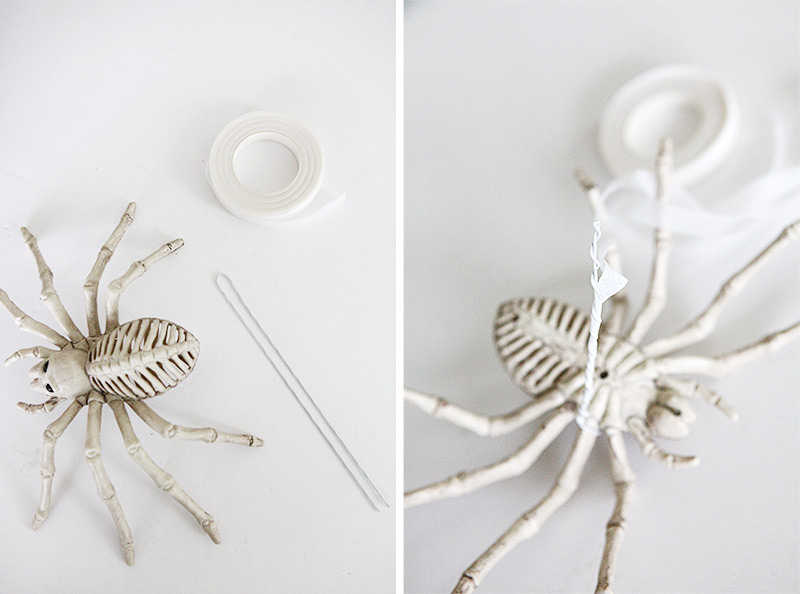
Online I had bought a pack of these stems with green leaves. And I also got me a spider. The dollar store had a version with no underside to it if you are looking for something less expensive.
And just as a side note: did you know these skeleton creatures also come in Horses and they are almost life sized. Magnificent. I am not getting one. But part of me really wants one. Can you relate?
I didn't re-use the yellow hydrangea you see on the picture from last year.
Ready for some very easy assembly? I try not to hot glue anything directly to the wreath so I can re-use the same wreath over and over again.
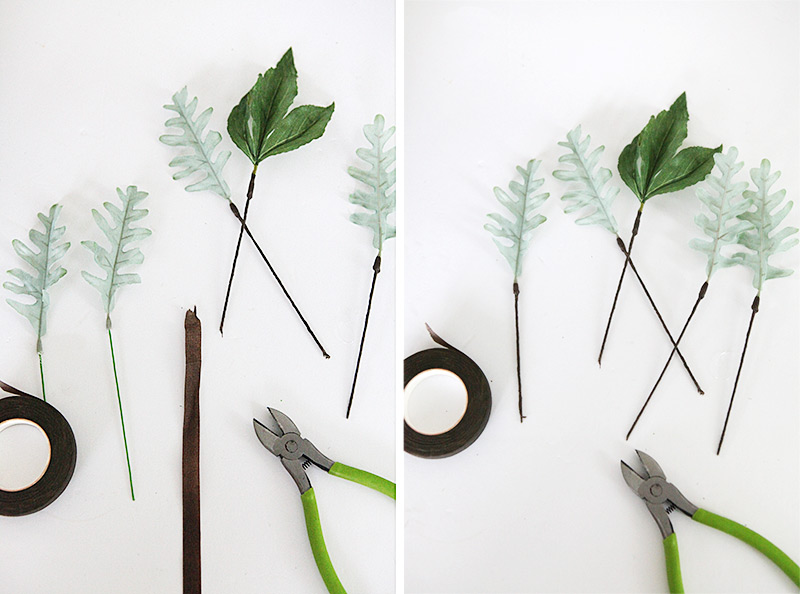
Step one. Insert the three greenery stems by weaving them into the wreath. I make sure they are all going in the same way - counter clock wise.
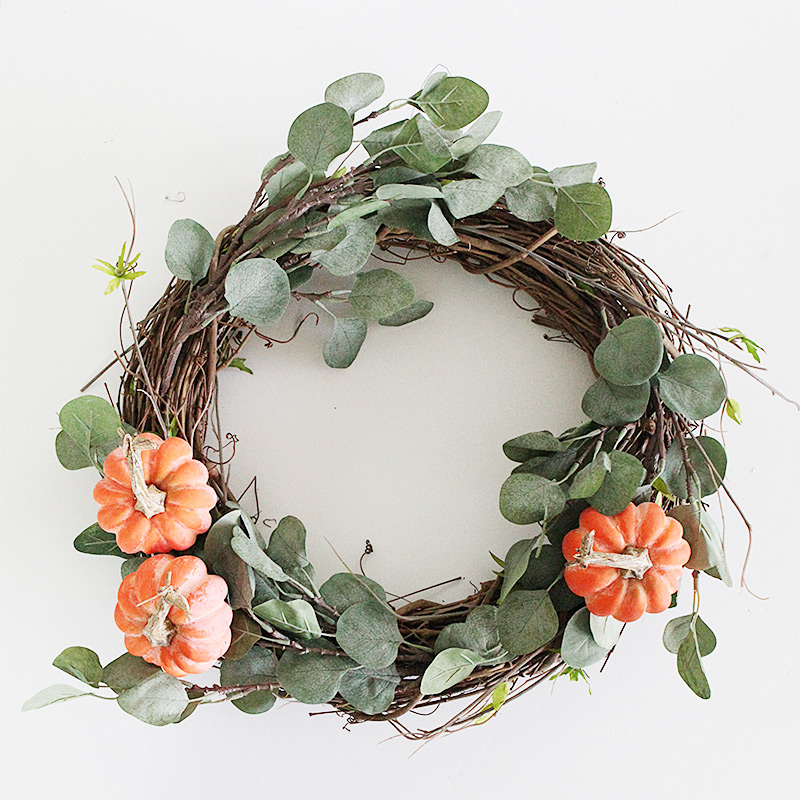
Step two. attach the wired pumpkins to the wreath. Bend the wire on the back. In stead of dispersing them evenly on the wreath, I make anchor points on three spots but give each anchor points different clusters of things.
Step 3. Next I took out the mini pumpkins from the bag and attached bent and twisted floral wires with hot glue to them like you see in the picture below.
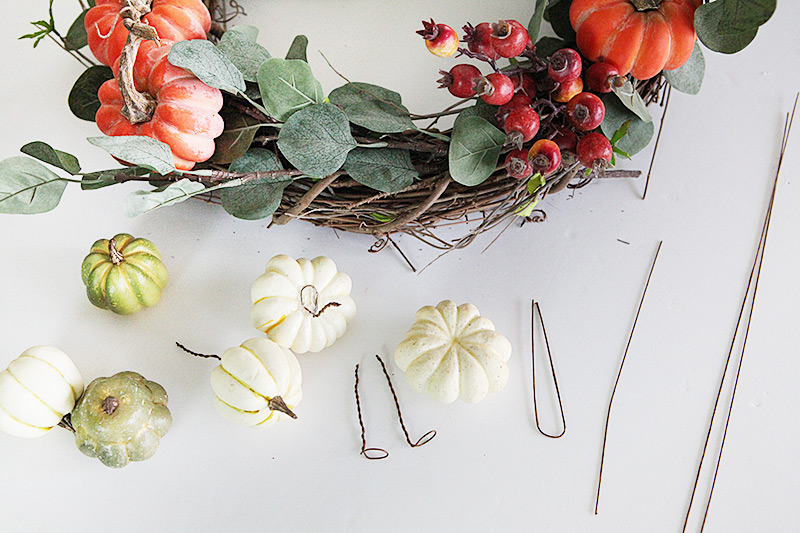
Step 4. I then inserted them to the wreath and added the red berries. Here you see the beginning of the three clusters. One at the top with two white pumpkins and a branch of berries. Bottom right an orange and white pumpkin with red berries and bottom left two orange pumpkins with a white pumpkin. I am leaving a spot open at the bottom for the focal point, the spider, to come later and added two small green pumpkins on the left upper quarter to fill in the space there.
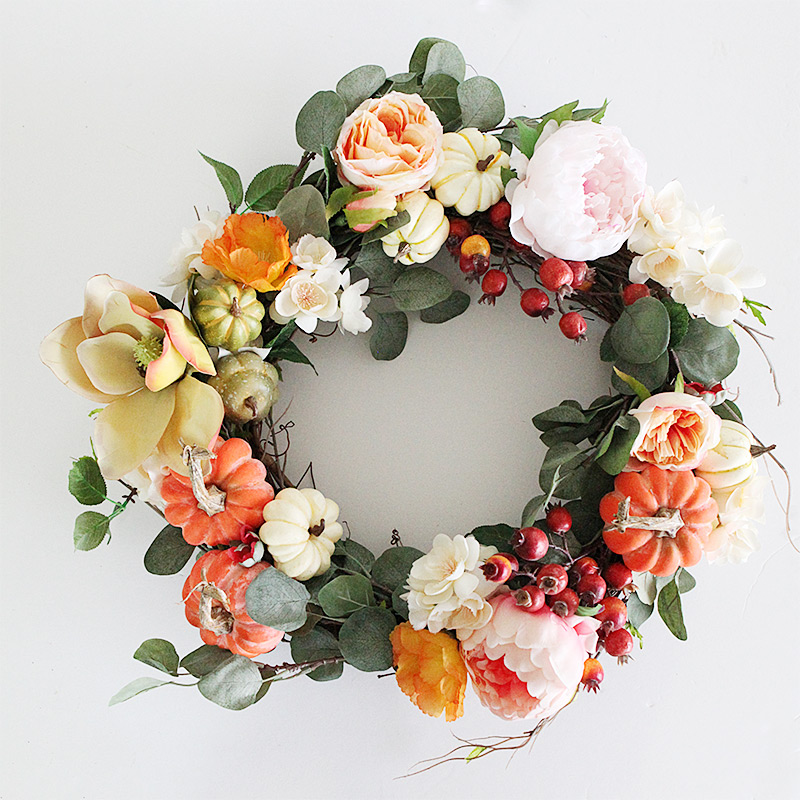
Step 5. Cut off the blooms from the floral stems leaving about 4-6 inches of stem (that way they can be reused later in a different way). Place them throughout the wreath. I like to place some like colors with like. For instance the large greenish yellow flower on the left, I placed next to the green pumpkins to have a little light green moment over there.
Step 6. To mount the spider, I put a white floral wire around its front leg and twisted it. Then twisted white floral wire around that to make it look nice. I may have dabbed the floral wire right around the leg with some off white paint to make it almost disappear. (I am a member of overachiever's anonymous)
Step 7. Some leaves were left of the floral stems. I plucked them off, hot glued some floral wire to each and twisted some brown floral wire around the stems for a more realistic look. Then inserted them into the wreath.
My wreath already had a wire loop on the back for hanging. Here is the final wreath. Some very easy Halloween home decor.

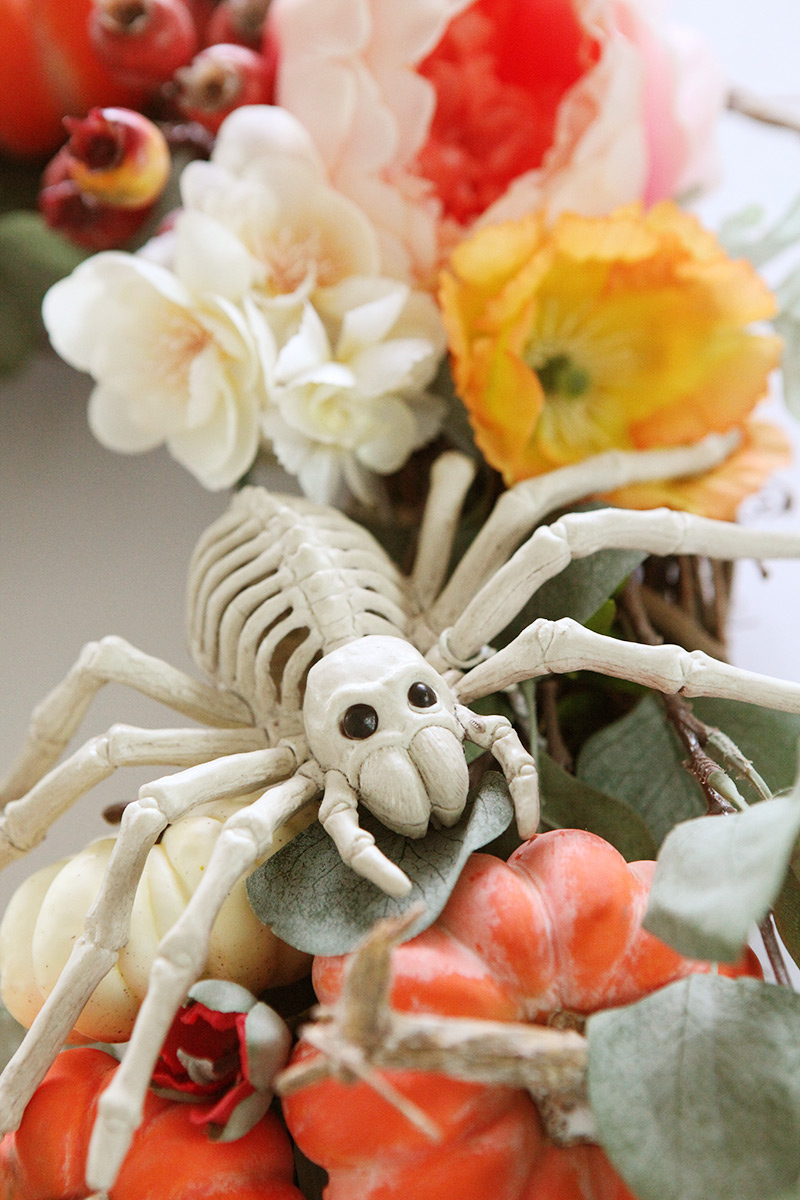
And a close-up of the dangerous spider. Uooooh.
Some blog posts contain affiliate links to products I use. More information
This article: Hallween wreath in pink, peach and yellow - very easy to make. first appeared on http://ahomeforcrafts.com.
Share

I am a Danish American decorating life in Seattle. I love all things design and I am especially passionate about color, scale and texture.
I can’t think of anything more fun than coming up with a new project, making it, photographing it and sharing it with you on my websites.
AHomeForCeramics.com AHomeForDesign.com AHomeForFood.com AHomeForCrafts.com My Portfolio