How to deal with SVG files with score lines
Sometimes the SVG files I offer here contain score lines with the shapes. When working with an SVG file like that, there are few easy steps you have to take to tell the Cricut software what to do. Cricut can tell that there are two layers, but it sets up both layers as cut lines so you have to tell it that one layer is a score line. It also sets up the layers unattached, so you have to attach the layers or else the score lines will come out on one piece of paper and the cut shapes on another.
First the short version:
1. In the Cricut layers panel click the scissors symbol and select the the score symbol in the layer attributes panel.
2. Select the cut and score layers that belong with the same shape and click Attach to attach the layers.
That's it.
Here is the longer version with pictures:
Here is a picture tutorial on how to accomplish those two tasks. It's quite simple and should only take a moment.
Step 1
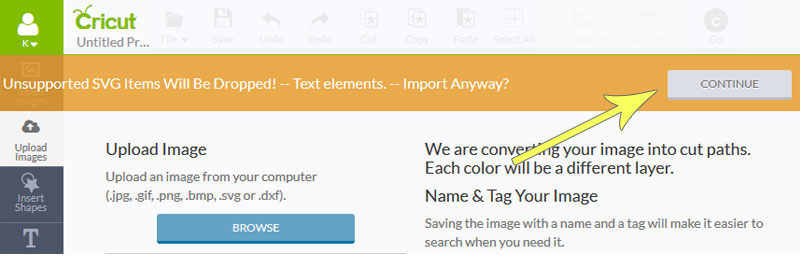
When you upload an SVG file that contains score lines, you may get an error message saying: Unsupported SVG Items Will Be Dropped! - Text elements. -Import Anyway?
Ignore that and click the gray CONTINUE button.
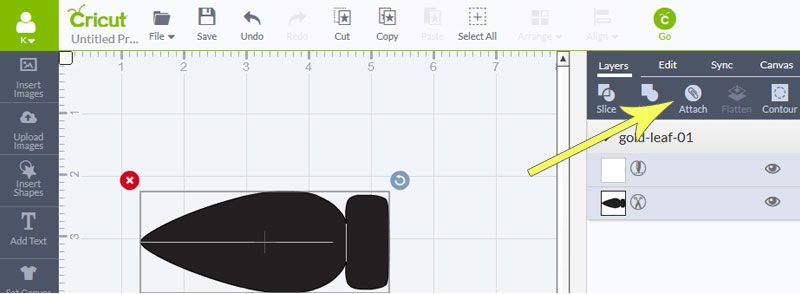
Step 2
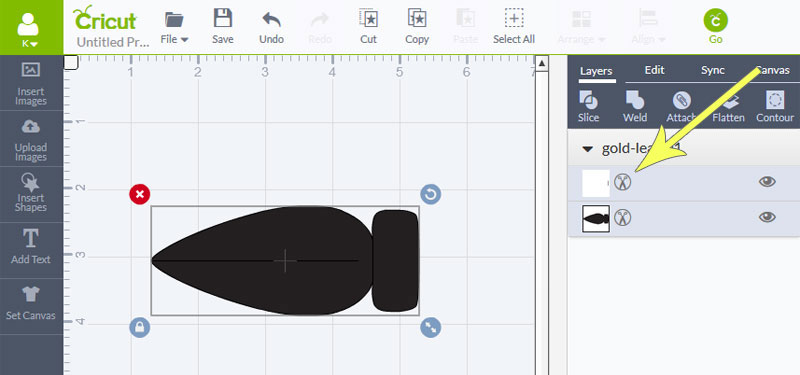
Next, insert the file into the project space as usual. You will see that there are two layers on the right. One layer contains the score line and one layer contains the shape. Both, however are marked as cut lines as shown with the scissors symbol in a circle. We will now change the scissors symbol next to the layer that contains the score lines by clicking it.
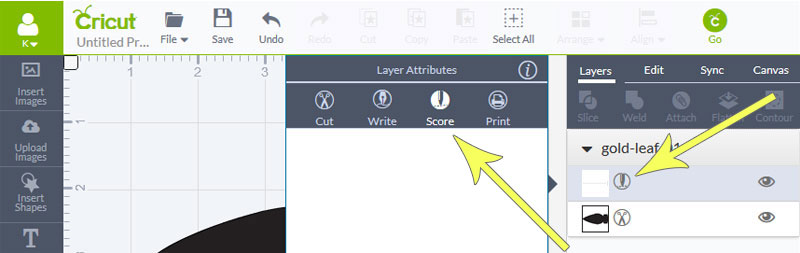
Step 3
This will open a fly-out panel with Layer Attributes. Click the Score symbol and watch it change the Scissors symbol to the Score symbol in the layers.
You should now have a Scissors symbol next to the shape or shapes you want to cut and a Score symbol next to the layer containing the score lines.
Step 4
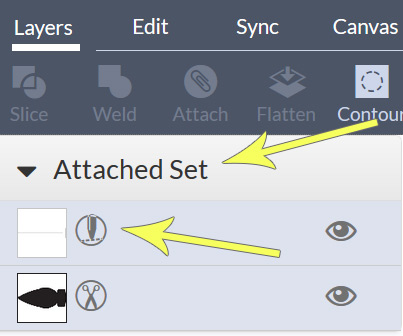
The final step is to attach the two layers so that the score line will be made on the shape and not on a sheet of paper on its own. To do this, highlight the both or all layers that go together so that they have a bluish tint to them. You do this by holding down shift and selecting the layers. You may have to click a couple of times. When both or all layers are highlighted the symbols at the top of the layers palette become available. One of those is Attach. Click it to attach the score lines to the shape layers. A big thank you to Mandee Thomas for working out this score lines conundrum. You rock!
The layers palette for this project now looks like this and is ready for prime time. Notice the score symbol on the score layer and that the layers are in an Attached Set.
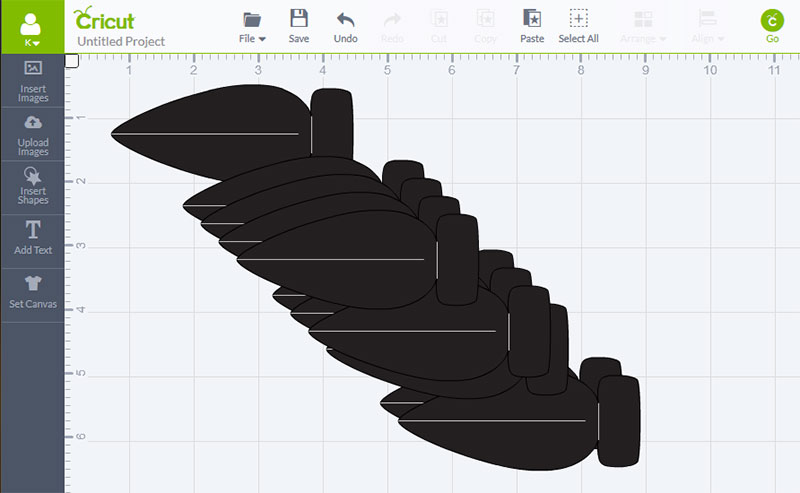
You can copy and paste it to cut many of the same shape out of one piece of paper if you like. Remember that you don't have to distribute them neatly. Cricut will do that for you on the following screen.
See below how I just copy and pasted a bunch onto the project space.
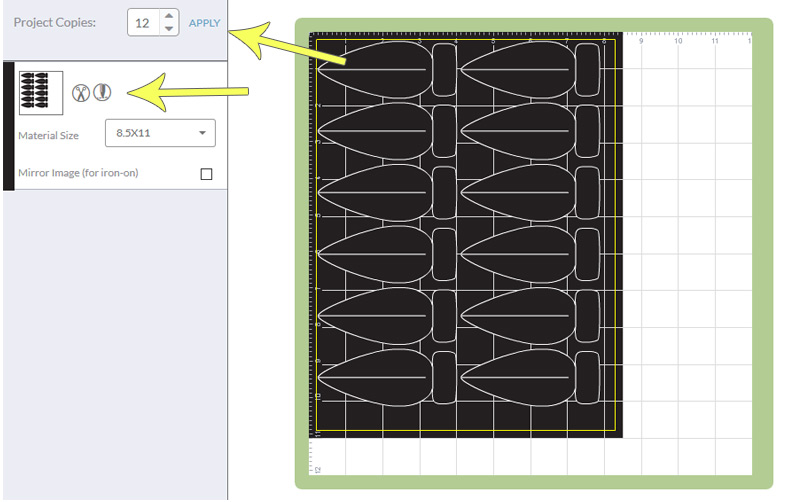
And then on the next screen the shapes are dispersed evenly. Also there is a cut and a score symbol next to the file. Scroll down past the next image to see what it looks like when the scoring tool is inserted.
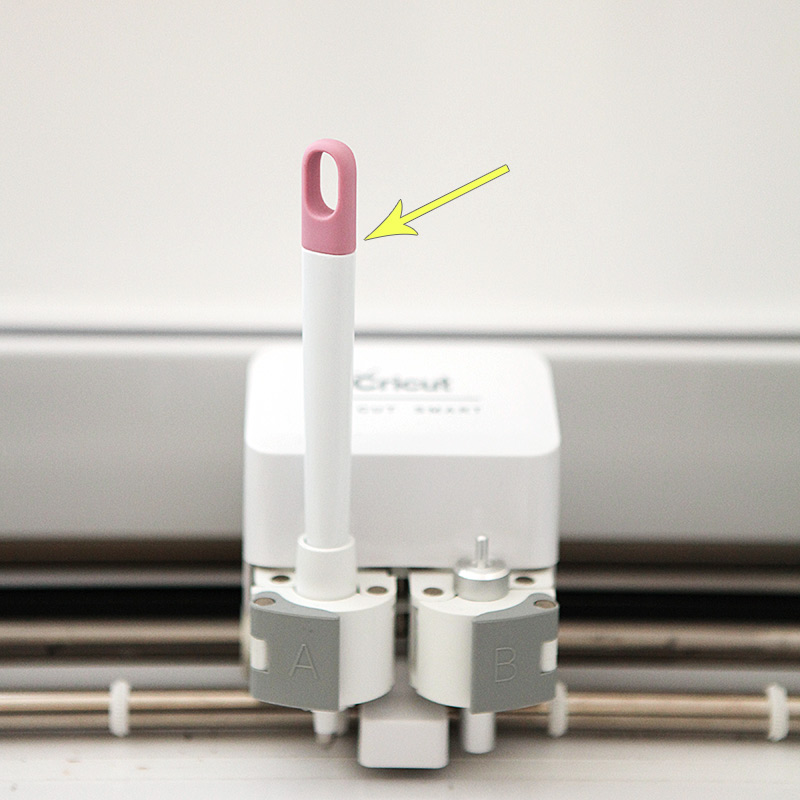
Step 5
I use this scoring tool.